Monday, October 31, 2011

Sissie's House Sketch


Way back when, I did a giveaway to celebrate my 400th follower!  
I offered to sketch the winner's home as a gift.
Sissie, from the popular blog, Sissie's Shabby Cottage
 was selected and I finally finished her sketch. 
 It took her a while to get it to me, 
and then I was off on summer vacation~so here it is.
Sissie's house is beautiful and has a lot of details like multi-gabled roof lines, 
so this was a little bit of a challenge for me.  
My sketch style is simple storybook style~
so here is how I interpreted her home.

 Since the house was all brick with white trim and a lot of roof showing in almost the same color as the brick, this sketch does not have a lot of color~it is more about the shapes of the windows and the lines.  With a fine tip sketch pen I drew in all of the windows and the roof shingles and some of the bricks and then added the color with my pencils.
Isn't her house glorious? I love it's classic style!
This "sketch" is something anyone can do by going 
to Picnik.com and uploading a photo of your home,
 then add the "sketch effect" to it~and voila! 
Your home has been sketched!  I hope Sissie likes her sketch.  
Her house is on the market, 
and this sketch just might become a fond keepsake.
Sissie's Shabby Cottage
Read more »

Sunday, October 30, 2011

Romancing the Kitchen

Isn't this tray pretty?  
I couldn't resist purchasing it to add some romantic style for my kitchen. 
 Vintage desert dishes stacked inside an old cheese box sit next to the tray.
 I like the mixing bling from old silverplate and rustic wood objects together.
 Having so much enjoyment with my new countertops~
everything looks so much prettier now.
 The nice thing about a mostly white kitchen is you can change 
out the accessories and have a completely different look
 without any heavy lifting.  Imagine how easy it would be
 to have a blue and white kitchen just by changing the displayed china.

 Pink lusterware dishes and a pink mercury glass vessel 
sit together on an old tole tray that I painted pink.
This tray was a trashed and rusted old tray. 
If you have one, just spray paint it white and then paint
 or decoupage the bottom of the tray to get it back in service.

 A ruffly runner is added to dial up the girly factor~
maybe this should be for Valentines Day only.
 Romance in the kitchen can easily be overdone~
I might have overstepped my bounds here!
Maybe this is a little better.  Still pretty, but not gag me pretty!
This tray was made by Penny of Lavender Hill Studios~the day after I got it I read on her blog that she is going to move away from making her mosaics to doing other artistic endeavors.  However she is still doing commissioned pieces, and Penny is making a special creamer lamp out of my purple transferware for me. She still has a few things left that you can get if you want to add some romantic style to your home.  You can visit her Etsy shop by clicking here.

linking to
Wow Us Wednesday

Read more »

Saturday, October 29, 2011

Feathers and Fall Decorating

 Snow came yesterday and it will come again tonight~
the day before Halloween!  
Yes, frost was on the pumpkin in Boston.
Despite the snow we will still have
 fall decorations up until the day after Thanksgiving. 
 Most of my decorating colors don't include traditional autumn shades
 of orange and rust~so I can't say that this is the 
time of year my house looks best.  
But still, there are a few things that I wanted to share with you.
 This big round coffee table holds all the books and in the center
 I can add some seasonal touches~
and one of them is something I have been wanting to add for a long time...
Pheasant Feathers!  
I have admired them in magazines and in blogland 
and finally got some for myself.
I put them in a mercury glass vessel next to 
Donna's creme colored pumpkin  with the green velvet ribbon
 that she made with her own hands.  
 I think they sold out of her Etsy store~
but you can go check by clicking here.
 I found these on Etsy too...I wanted big feathers!! 
So when they came they weren't so big, but they were still pretty. 
 I love seeing feathers used in floral displays and on wreaths as well.
 I have to include a parting shot of my beaded chandelier~
I sold it on Etsy, and it is going to another blogger's home very soon!!
 Mikey, from the ShabbyFrenchCottage bought it! 
 Goodbye Mr. Chandy!
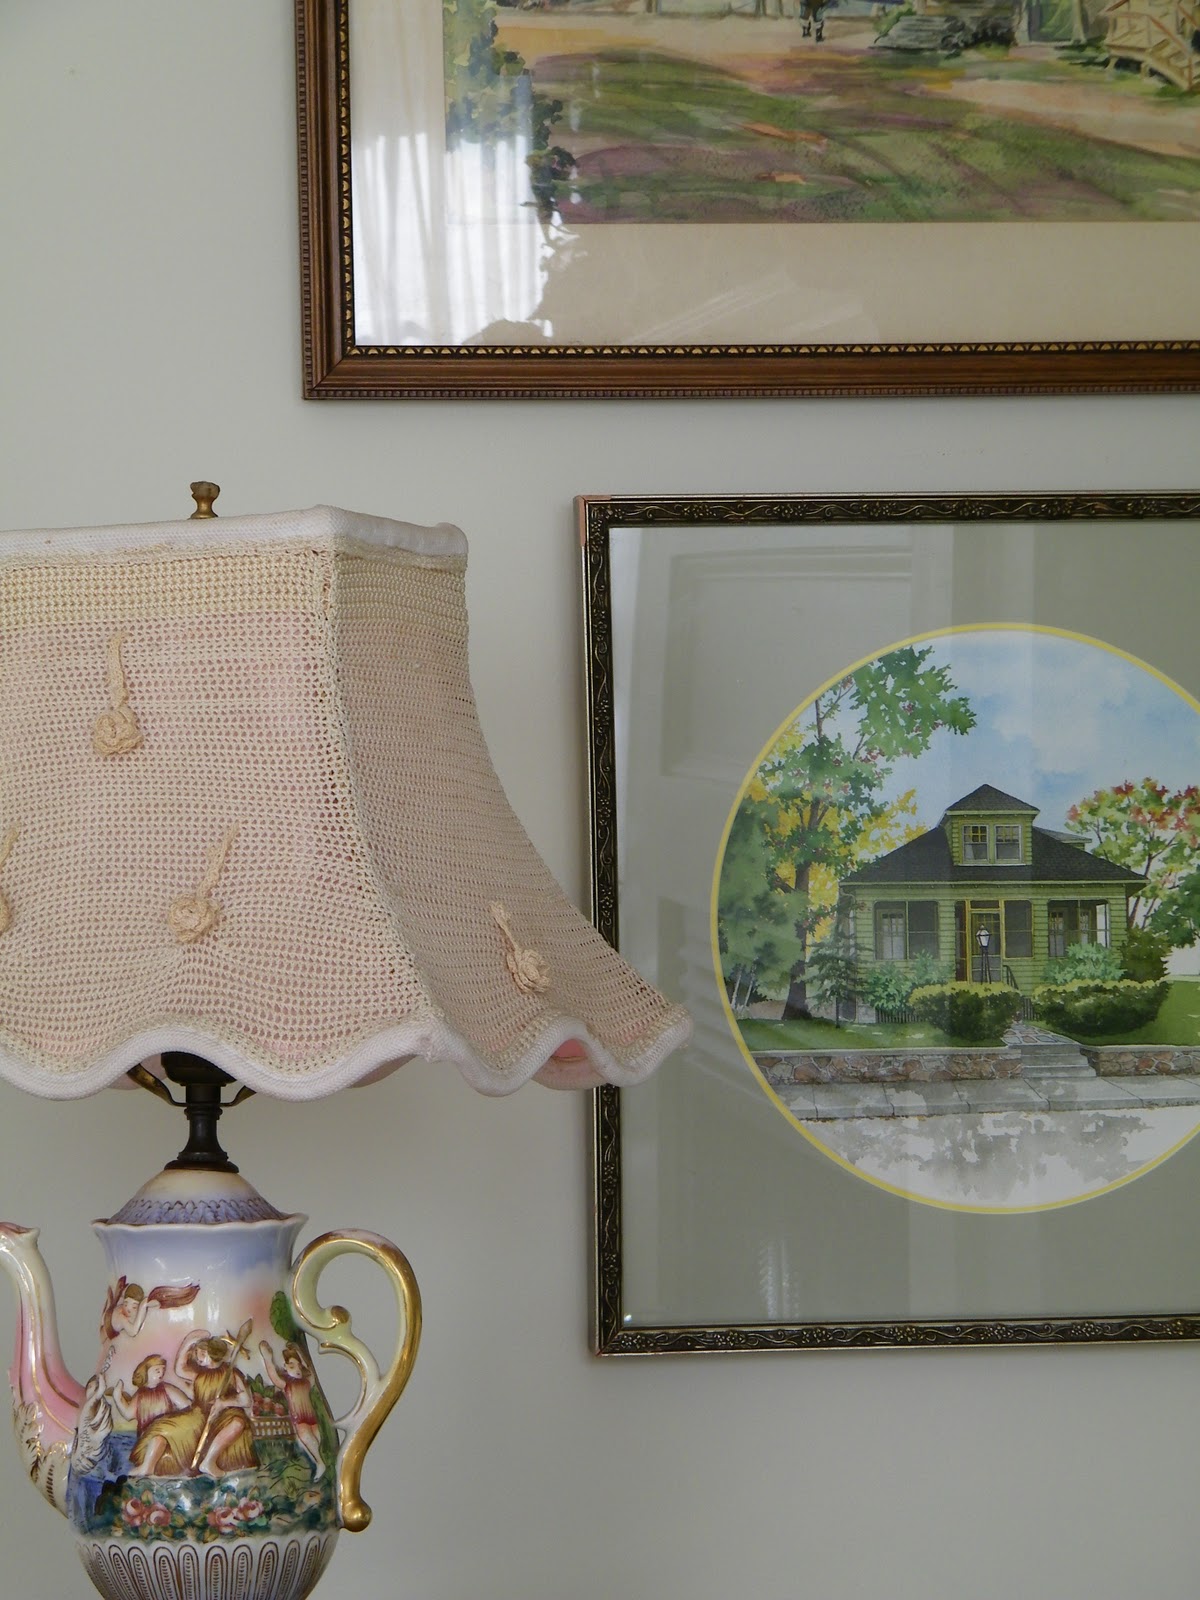
 Did I show you the pictures above the corner chair?
 This watercolor is of a fishing village 
and I loved all the little pretty houses in a row by the sea.
 This little house sketch is of the
 first house Mr. Maison Decor bought in his twenties.
  It is a darling bungalow and we drive
by it every now and then as it is right around the corner.
 Strange fact:  It belonged to his great uncle, who was the original Mr. Peanut!
Note: Nita said maybe people don't know who Mr. Peanut is.
Mr. Peanut is the character that represents the Planters Peanuts Company.
Mr. MD's great uncle Wesley was an executive for Planters in the Northeast region.  Planters decided to have a costume made up for shows and parades.
On Halloween his great uncle and aunt gave away all things Planters, like packages of peanuts and keychains with Mr. Peanut and everyone in the neighborhood loved going to that house for trick or treating.
Back to my feathers~I do love having them and hope to get more. 
Kelly from The Essence of Home said she got hers at Hobby Lobby. 
You should see the size of her feathers!
 She was shocked when I said we have no Hobby Lobbys in New England.
  I figured she was picking them off of her country estate lawn! haha!
PS. I must confess~what I was really doing with this post 
 was trying out my new tripod.  
I needed to take a bunch of pictures and practice. 
So that is why there are pictures from all around the room!  

Read more »

Friday, October 28, 2011

Cottage Washroom Cabinet Appliques

 My combo laundry room and powder room~
so I call it a washroom.
This is the place all of our guests get to use when they feel the need.  
So the idea of creating a cottage washroom was born.  
 The cabinets got a two tone paint job in blue and cream
 and then got some antique glaze over it after some vigorous distressing. 
 A big carved molding was applied to the top of the cabs taking them to new heights.
 Recently I got the idea to add some laurel wreath appliques to the door fronts.
 These appliques are made out of wood and I found them online at Vandyke Restoration.
 They have that frenchy look that I find appealing.
 I gave them one coat of the cream colored paint 
and was ready to apply them with hot glue to the cabinet fronts.
 Here I am holding it in place for 5 seconds for the glue to take hold.
 I made a pencil mark 3" down from the top of the arched cabinet top. 
 After that I lightly applied and rubbed off some Valspar antique glaze.
 
 The appliques are all finished and have added a
 little bit more interest to the washroom cabinet fronts.
 This was also the washroom that I had applied 
wallpaper to the ceiling using a faux tin tile paper.
 Oh look over there~more of that speckled laminate I LOVE soooo much....not!
 A pair of vintage botanicals I found on Etsy are hanging in here now.  These prints must have been everywhere back in the 40s and 50s, because they are cheap and easy to find.  I like the bamboo frames on these, and I think I paid $10 for 3 of them.
 A few odd baby blue transferware dishes
 from Brimfield share the wall with the botanicals.
The appliques were a quick and easy decorator detail to add to the cabinets.
I decided against adding them to the vanity doors~
now, if I can only move past this countertop....
Read more »

Wednesday, October 26, 2011

Putting in the formica countertop and sink

This is the part where I show you how Mr. Maison Decor and I did the changing out of the counter tops and the sink.  If you are considering replacing your laminate counter top  with an upgraded laminate like the new patterns in the 180fx Formica, it is possible to do it yourself.  This photo above shows the finished set-up, but here is how it got that way.  Hopefully this post gives you the answers and solutions you can use doing over your own budget kitchen remodel.
 The plan was to do it on the weekend.  I was lucky enough to convince Mr. MD to start on the project while he was still in his PJs.  He had worked the night shift at the police station and was just getting up around noon~I was DYING to get this counter top and sink installed, and thank my heavens, he is a husband who likes a happy wife.  First order of business was to disconnect the faucet and then unscrew the bolts that hold in the sink.
 That took about 10 minutes and out comes the sink!!
 I just loved this picture of our hands working together on this project.  It is very romantic (to me).  Our wedding rings say it all: For better or for worse and for all home improvement projects, until death do us part.
 Once the sink was out, all we did was unscrew the cabinet from the counter tops and it came right out.
 I scraped away the layer of plaster that built up behind the back splash board.  Our new counter doesn't have a back splash because I don't like the look.  However I want to make sure the surface is smooth before I wallpaper the area with the bead board paper.
 Gotta love a guy in dog PJs that gets the job done.  You can see here that Mr. MD has set the vintage sink directly on top of the cabinets to mark the location of where it will sit when the counter is in place. Make a pencil mark on your cabinet front...
 Now the faux marble slab gets put in position. Luckily it is a pretty good fit.  It looks like heck here, but since I knew to expect that after doing the other area of the kitchen I was not freaked out this time.
 This is the scary part (for me anyway). Drill a big hole in the middle area where the sink bowl will go.
Then mark the size of the bowl and get out the jigsaw and starting at the center hole cut out towards the lines. We did not make a template because our sink did not need an exact size hole cut out. We kind of did our best guessing!! With a tape measure, of course, and those pencil marks on the cabinet underneath.
 Our sink is gonna go in that hole.  Because it has this huge overlapping metal part, our hole did not need to  be perfect.  Now take your sink and see if  you did the figuring right.  That is a scary part too.
 Oh, the other thing that ended up being lucky for us was that the back splash to the sink fit tightly underneath the window apron. That could have been a difficult and messy job cutting that out to fit the sink in~but since we are usually lucky, it went in with just a little persuasion~
 In the form of a rubber mallet! It fit like a glove!  Since we were both going to do the next part I don't have a picture of it, and it was too dangerous to try and use the remote feature on the camera~I needed to focus.  Mr. MD applied a bead of silicone adhesive under the rim of the sink while I held it up like a hinged door.  Then we set it back down and wiped away any that squirted out so there was none showing.
 Well the adhesive part took place later after we removed the sink so I could do the wallpapering behind it.  You can see what a big part this piece of the makeover is.  Of course you could do a white subway tile, but do you realize how fast and easy and inexpensive it is to use bead board wallpaper for a good looking alternative?
 As the wallpapering is going along, you can also see the nasty formica seam that I detest.  Black lines be gone!
 Black line to the left, white paint to the right. It makes the seams disappear.  It really does.
How you do it is to hold your brush on the flat and just tap it against the seam.  Don't try to paint the seam with the tip of the brush or you will want to kill yourself.  ( That is just a guess).  This is so much easier.
Voila~the $75 Craiglist drainboard sink installed in the Formica Calacutta countertop.
Look at those invisible edges~it really has the look of marble.  I have to say I am impressed with this product.
The marble look counters, the mini hutch I made out of a cabinet, an old sink and the bead board wallpaper all created a charming space out of this once dreary room.
 Every time I walk in this kitchen I feel so glad I finally made these small changes~ if you are stuck with a tired and dark kitchen, you can do it too.  Anyone can paint cabinets.  The counter tops were ordered to my measurements at Lowes and delivered one week later to our house.  You will need a helper to lift the counters, but they are manageable.  The sink we found looking around on Craigslist. You might have to hire a plumber to disconnect the faucet and then hook it back up for you, but the rest you can do yourself.  So don't be afraid.  The payoff is big and I guarantee you will be glad you did it.
This is the story of how it all went together~and the price tag was just around $1000 for everything!
A little reminder of how far that $1000 got us.


Read more »