Showing posts with label wedding. Show all posts

Wednesday, March 20, 2019

The Lake cottage, White kitchens and the Wedding painting

The lake house is in the beginning stages of planning!
 Our rustic unheated 1910 fisherman's shack is
going to get torn down and a year round home will take it's place.
I haven't blogged at all about the lake cottage, but that soon will be 
making its way to my blog as we get ready for the next phase of life in retirement mode,
as we plan to move into it after selling our Boston area home.
White kitchens have always been a favorite of mine. 
 I think they are timeless and 
so the new cottage will have white cabinets.  While looking for inspiration 
I found some pretty examples on Traditional Home magazines website,
so lets take a look!
Rarely do I see a French Country kitchen anymore, so this was surprising to see.
However our kitchen and cottage will likely be less "Frenchy", and
more of a blend of traditional, craftsman and cottage styles.
 Another white kitchen from Traditional Home with color on the ceiling.
This kitchen is actually on a lake, and I love all the choices I see here.
 A creamy white cabinet color with marble and butcher block.
Views to the lake is driving the design of our cottage
so we can take advantage of having a home on the water's edge.
You would never getting tired looking out of the window at the kitchen sink.
Double islands in a fun color in an otherwise white kitchen.
Our kitchen will be modest in size, but in an open floor plan
to the living space which will give it an open feel. We will have
an island and have toyed around with color ideas.
This is our current kitchen as seen in Nora Murphy's Country House Stye book.
Because it is in a contained space it feels small. 
I painted my maple cabinets white years ago and still love the look.
They say you can tell the decade a house was built just by looking at 
the kitchen cabinets.  Knotty Pine, Golden Oak, Cherry, Thermafoil...
they all have had their time being popular, and then falling out of favor.
White kitchens are timeless!  A quick change of accents and hand towels,
and you have a whole new feeling for your kitchen.  
 Last but not least,  the wedding painting!!
I wanted to show you the finished painting of my son Brandon's wedding
to his bride, Mimi.  Live event painter, Sheila Foley started this painting during 
the outdoor wedding we held in our courtyard under a tent,
and finished it in her studio and called me about a year later to say it was ready.
It was worth the wait!!
We now have a unique memento of a special day for our family, and it 
captured the wedding festivities and mood so well! 
The attention to detail, and capturing peoples likenesses was unreal!
Simply amazing!
This was taken an hour before the guests arrived for the wedding,
where Sheila had started the background of the painting.
To see more about the wedding day 
and the painting in progress click here.

For more information on live event artist  Sheila Foley, click here.


Read more »

Thursday, April 5, 2018

Our Courtyard Wedding in Romantic Homes magazine and more French Chairs


 The May issue of Romantic Homes magazine is on the stands and inside you will find a nice little feature on the courtyard wedding we had last September.  The cheery yellow and white cover is hard to miss, so look for it in Barnes and Noble, grocery stores, Walmart and other places like that.
Look at those darling slipcovers on the chairs!! Lots of spring inspiration inside this issue,
as well our wedding feature.
 Here is a sneak peek, and it tells the story of how I conjured up the fairy tale theme with a French twist to guide the decorating angle of the wedding.  All the advice is applicable to throwing a party as well, so I hope you enjoy the narrative as well as the beautiful photos taken by Matthew Mead.
 Our wedding had guests arriving inside the home, and then ushered to the outdoor area where a tent stood waiting for the festivities, so both images inside and outside are part of the spread.
 Romantic Homes is my go to for French inspired romantic living ideas, 
and I am honored to be included.
As with any magazine feature, a lot of cuts must be made, yet some of my favorite images and elements were not shown. If you have read the article and would like to see more, this is for you!  It was hard to tell the relationship of each space to each other from the published photos, most likely due to our spaces being small and rather nook and crannyish. 
Here the tent looks up to the arbor where the wedding vows were performed.
 We used all the little garden spaces for different purposes, as you can see on the upper level where the bride and groom are chatting in front of the arbor, where they had exchanged wedding vows, with the Boston skyline in the background, while the musicians played in front of the garden shed.
The tent sat just below, beside the house in our small pea gravel courtyard.
 My favorite element in the wedding that didn't get mentioned was the live event artist.
Sheila Foley is one of the best in the business, and happens to live in the greater Boston area.
She came early and painted the background scene on her canvas, which was the interior of the tent leading to the cabbage garden and arbor where the vows were exchanged.  I love how she included the chandelier and tulle draped from the ceiling of the tent.  As the wedding progressed, Sheila added guests and the wedding couple into the painting, while we all ate, drank and made merry.

Before the festivities  I came out to see if everything was ready to go... Sheila is at her station with her art supplies and easel.  Because it had rained, we needed to set up a table umbrella to protect both artist and artwork!  
You can see the white picket fence beyond where the bride would emerge to climb the old stone steps to the grassy terrace to say her vows.  Sheila had the background ready for adding all the details, including champagne bottles, the french settee, floral arrangements and of course all the people!
This is a sneak peek collage of the painting progression so far!
I have been able to see bits of it on Sheila's Instagram account: @sfoleyeventpainter
I can't wait to reveal the entire painting and already imagine it in a fancy French gilded frame, hanging on our walls, reminding us all of that special day.
And one last garden element that was missing....
Our cabbage garden!
White Belgian mums and ornamental green and white cabbages planted in a formal layout. 
 The urns were filled with more cabbages and then roses in florist water vials 
were tucked in between the large cabbage leaves. 
Simple.  Elegant.  And very French.    
Speaking of French~ 
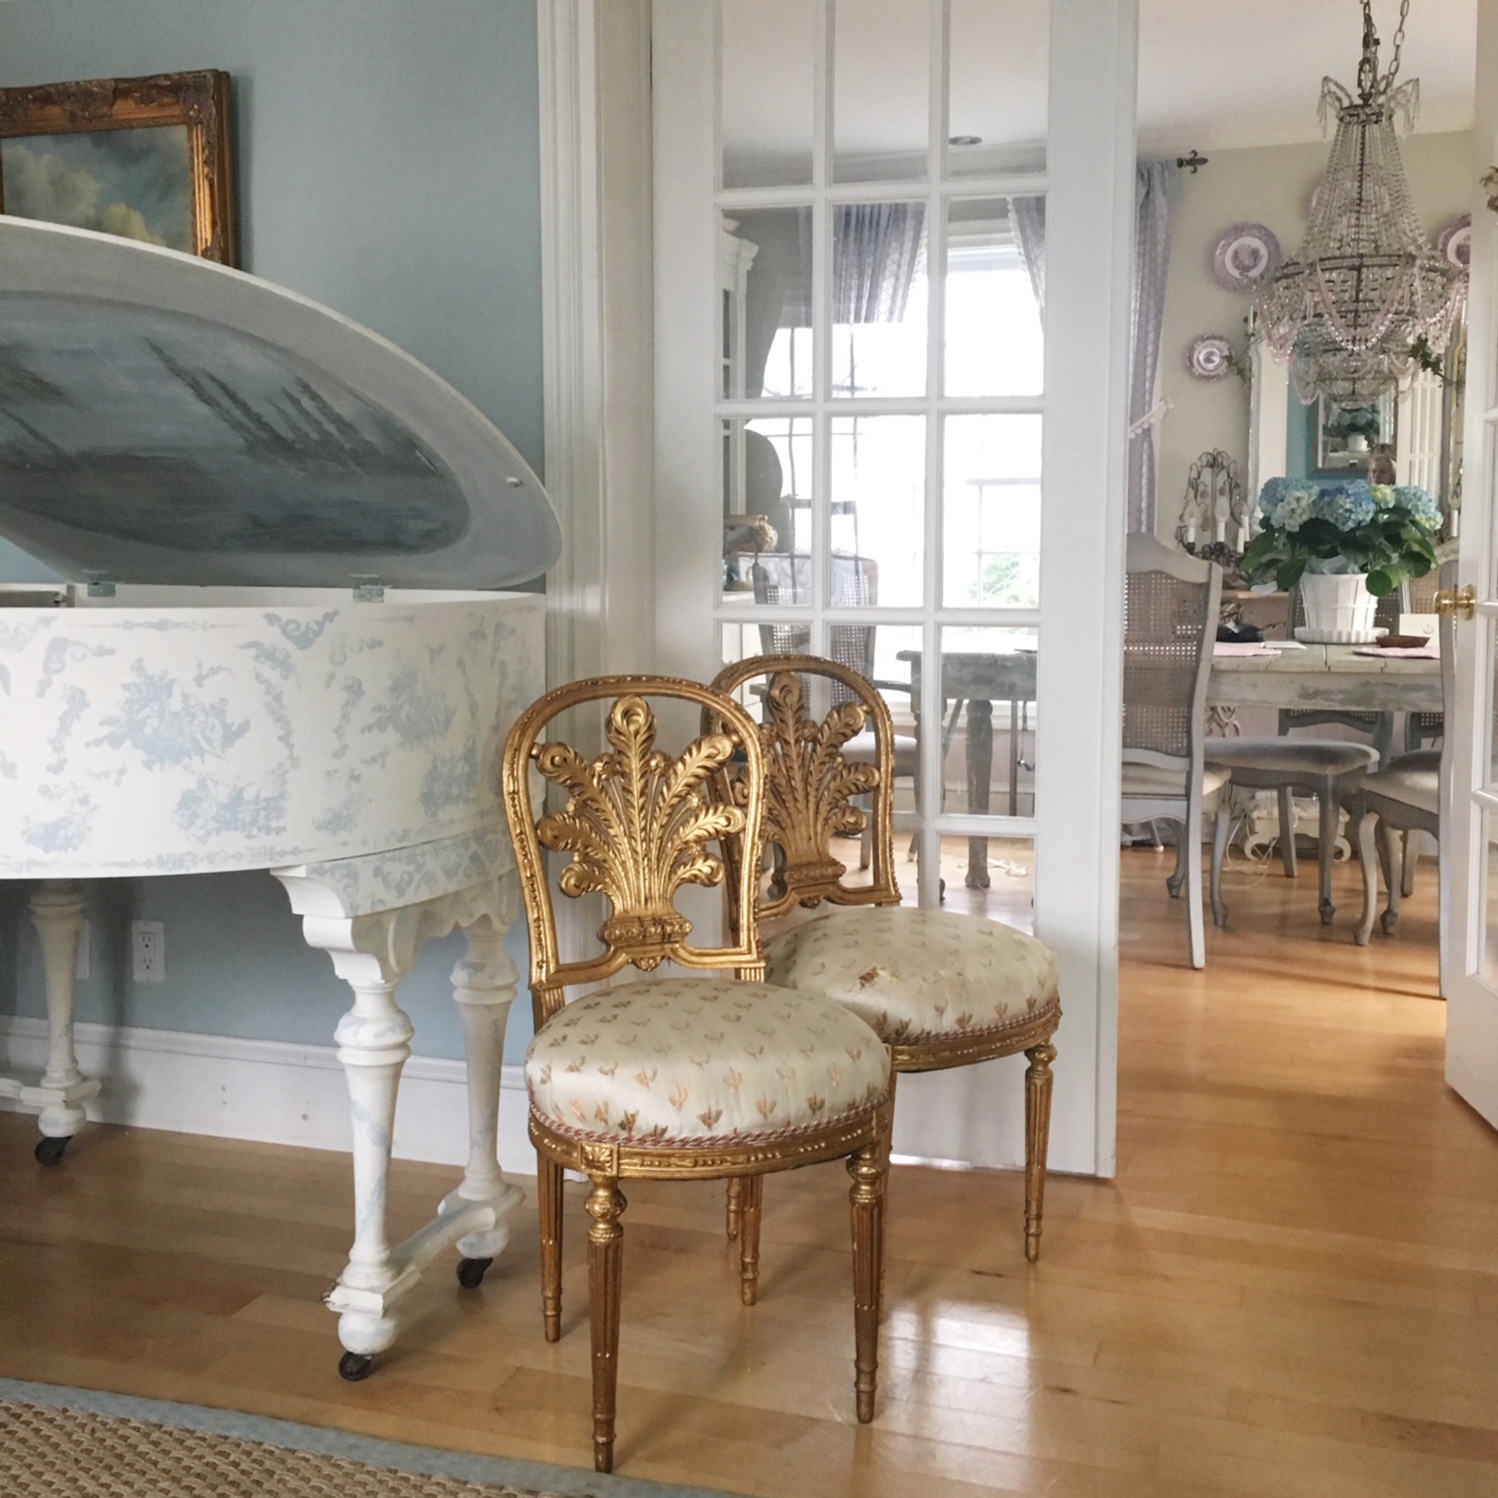
I had the good fortune to land a pair of plume back gilded chairs
in the Louis XVI style.  They are truly marvelous little chairs, all hand carved with gold leaf.
Destined for my bathroom for now.  I adore old and French, and these fit the bill.

 photo signature_zpsxi5q1w6r.png
Read more »

Friday, October 27, 2017

Purple Transferware Wall Display and Floral Arrangements


The purple transferware collection I have amassed is displayed in our dining room.
The latest bowl was picked up at Matthew Mead's Estate Sale last weekend, and it 
is a piece made by Wedgwood.  Quite old and it bears a few chips, it is lovely nonetheless
and for now it sits in a stand where I can admire it front and center.  It was the only piece I 
spotted and I was surprised to even find it at his sale, as I know he has a fondness for the purple
stuff himself.  His mother has a purple transferware dinner set herself, and Matthew grew up dining 
off of these pretty dishes, as I am doing now with my kids and family.  
 Since the wedding has passed, so have all of the beautiful floral arrangements, and I 
have to say I really missed having the gorgeous bouquets in our rooms.  I think flowers bring
a room to life, and I can tell you they are the number one decorating weapon for magazine and book
photo shoots.  The rooms look lifeless without them.  I found myself in Trader Joes and picked up 
 two separate bouquets that had the color purple in common. One even had a stalk of decorative kale
and pincushion flowers, and you just can't beat the price at Trader Joes.  So treat yourself and your
rooms with a bouquet and get a lift everytime you walk by....I know I do. 
 The floral arrangements for our DIY wedding were not DIY, but I think I could have 
made a good effort if I had needed to do so.  Either way, the table was lifeless without the flowers, and when I saw these pics I snapped the morning of the wedding. They were loaded in my camera
and I haven't seen them since.  I think the tables looked so pretty.  

So don't forget to treat yourself to some flowers, whether its the 
supermarket or a florist or your own backyard.
Heading into the weekend with this "tip".  
Get flowers. Enjoy. Relax. 


 photo signature_zpsxi5q1w6r.png
Read more »

Friday, October 13, 2017

Live Event Artist Captures Romantic Wedding: Part 3


Pure Romance.
It was the moment no one expected. 
 It captured us all with its sweeping gesture of old fashioned chivalry, 
something straight out of a romance novel.
The groom swept the bride off her feet after they were pronounced husband and wife. 
He carried her down the stone steps into the wedding tent to present his new bride.
Swoon.  
Its moments like those that we can't get enough of, in real life.
And it was just that moment that will now be captured forever on 
canvas by Sheila Foley, the wonderfully talented live event artist.
Have you ever heard of live event painting?
  I had not until recently, when I spotted Sheila's work on Facebook and Instagram
I was enchanted by her paintings.
The entire idea of it!  
It struck me during the wedding planning that hiring Sheila
would be PERFECT for capturing this wedding.  I love original art, and I was
amazed at the romantic impressionistic essence of her paintings of weddings,
 as they unfolded.... LIVE!
Sheila arrives ahead of time to see the wedding site, and at that time we briefly discussed 
ideas for the painting.  I gave her "carte blanche" to paint something she saw fit.  She said that was rare, that most often brides or the one commissioning the painting has something specific predetermined in their minds that they want to have painted.
 I think that the way to get the best out of an artist is to let them express their vision, and you won't be disappointed.  I know from my own experience that painting things for myself are often superior than the things I must paint on command, because the inspiration and artwork is guided instead of natural.
 Often times Sheila is painting at an event in a grand ballroom, and the architecture adds
a lot to her paintings, and yet our wedding was in a tiny tent.  I set her painting station up to afford her the best view of the ceremony, the tent, and the guests.  She arrived two hours early to start the 
background and the tent part of the painting.  Sheila will capture guests and moments on her iPad and then refer to it as she paints.  It was the most marvelous thing, to have an artist painting as
if she were just a fly on the wall.  The guests would come and look and then go back to their tables and it was fun to see the painting progress throughout the night.  While our wedding was all about keeping costs down, this was my one big splurge!  And you can see what she decided to paint
for capturing the essence of the wedding~that grand romantic gesture of Brandon sweeping Mimi off of her feet!  I cannot wait to see the finished painting.  Sheila takes the partially finished painting back to her studio and will work on it to add the guests and fine tune the details.
This is a closeup of a groom sweeping his bride off her feet during a dance,
and it was my favorite painting that I saw on her website.  This shot is from Sheila's 
website as I viewed it from my phone.
Sheila told me it was her favorite too! So I knew we were on the same page, and
now our family will have a painting by this amazing artist that recalls a moment
captured in time.  Fleshed out in the painting will be the faces of those who we were 
fortunate to have around the table with us, as Sheila actually paints the guests to look
like themselves!! That is truly amazing to me, as painting people is very difficult.
The painting takes shape, and this is the last I saw of her progress.  Stay tuned for the finished portrait of the wedding, I will be sharing that for sure.  Sheila Foley is in high demand, and I think its wonderful that people are recognizing the specialness of what she does, and how something like this can add so much to an event you want to remember in a uniquely beautiful way.
When I last blogged about the wedding in Part II, I said I would share my splurge (the painting),
and other details from the wedding and how we went about getting the wedding of our dreams.
 There were many other special moments of course, like the cake moment. 
 Personally I find the money spent of cakes to be CRAZY, and since I
 am not a big desert person,  I wouldn't spend tons of money on a pretty cake.
  However the bride loves deserts and pretty cakes, and so the hunt was on
 to find a cake that wasn't outrageously priced.  We found it.
 This pretty little white wedding cake with buttercream frosting was made by the chefs at WholeFoods Supermarket.  
Yes.  
A supermarket bakery department created this cake for Mimi.
Mimi described a simple white on white cake, to be frosted in buttercream with simple dots and flowers for decoration.  
The cost?  A jaw dropping $58.  
 These beautiful and romantic elements of a wedding do not have to cost a fortune, like we 
are programmed to believe.  I set the cake on a silver tray and we had stacks of vintage gold and white cake plates for each slice.  The top layer was a chocolate cake, and the bottom layer was white cake with strawberries.  Matthew Mead captured the moment beautifully for the couple.  The bride sliced up the cake and the groom delivered it to their guests.  A charming way to serve a wedding cake, don't you agree?
Vintage gold metal heart trays were used to serve a mix of chocolates.  I found this stack of interesting tiny gold hearts, and have no idea what their purpose was, but I thought they would make nice little trays for sweets.  Matthew and Jenny Mead took a great shot of it adorned with a tiny rosebud.  All the chocolates were bulk chocolates, delicious none the less, from Costco.  Ferrero Rocher, Lindt, Roca, and other sweets filled these cute little trays and were passed out as the wedding cake was being served by the couple.
One other expenditure that was fairly modest but added a lot, was the trio of string musicians 
that we hired to perform for the cocktail hour and the ceremony.  Thankfully the rain let up, but we kept them under an umbrella just to be safe.  Find musicians like these on Craigslist, or a local music school or college and you can hire them by the hour to add a touch of elegance to your event.  What fun it would be to have musicians playing at a cocktail or dinner party!  I think we often overlook ideas that aren't super expensive, yet create a memorable feeling for the event.  Live artists and musicians can give such a "rich" experience for both the guests and the hosts. 
 Lighting is a big consideration for creating the right mood, and for an outdoor event, its easy to string lights, wrapping tree trunks and branches.  Starting at the base just ball up a string of lights and wrap the trunk and then connect another string and so on, until you have reach the upper part of the tree.  You can just wrap trunks, or you can add more, as my son Brandon did in the tree that the bride walked underneath.
This shot of my buddy Matthew Mead shows how magical the trees appear
as dusk starts to fall.  Its an inexpensive trick and just takes time to do it.
 It all added to the romantic effect we were aiming for....
The guests had departed, the wedding was officially over. 
Still wanting to linger in the magical spell cast upon us all, 
the newly weds danced in the living room with family watching,
 until the clock struck twelve.

A very romantic wedding was enjoyed by all.

Read PART ONE here Fairy Tale Wedding without the High Price
Read PART TWO here Romantic Home Wedding Dreamy Table Tips


 photo signature_zpsxi5q1w6r.png
Read more »

Thursday, October 5, 2017

Romantic Home Wedding Part Two: Dreamy Table Setting Tips


Creating a romantic mood was the goal for this backyard wedding.  Our yard
is a very small space with a series of terraces, and so each space had it's own function.  The upper level with the arbor was to be the ceremony area.  Walking through the arbor would lead to the garden shed, and that is where the musicians played for the cocktail hour and the ceremony.  The bride and groom said their vows in front of the arbor with an officiant. The bride wanted a storybook  romance for the ceremony, and what better way to do that, than to sprinkle three thousand pink rose petals on a pathway leading to the arbor.  A small cabbage and mum garden had been planted for the wedding, and two large urns were flanking the "stage".  
 To make it romantic, I placed cut roses in water vials and tucked them in between the cabbage plants.  Then I draped a swath of tulle between the handles of the urns for an enchanted effect.
 Cabbages, silver leafed Dusty Miller, Roses and trailing flowering vines from an earlier summer planting (which we didn't remove) made for beautiful and inexpensive arrangements.
 We kept the arbor simple, with a draping of two rows of white tulle for extra fullness, and tied it off at the sides with the Costco satin ribbon and bunches of white roses and silver lambs ears from Walmart.  Yes, Walmart.  They have some terrific faux flowers at ridiculous prices, less than $3.00 a bunch or stem.  From a distance you couldn't tell they were faux, and they repeated the live flowers in the urns below.
 The day of the wedding we knew to expect rain, which was a bummer.  But it had to be dealt with, and with the tent to cover the dining area, we needed a large umbrella to cover the musicians, who would sit in front of the shed.  The "cocktail lounge" was our regular furniture arranged on another level, next to the tent.  If it was rainy we decided our contingency plan would be cocktails in the living room before the ceremony. 
And that is what did end up happening, as you can see from this fantastic collage photo
by our friend and photographer, Matthew Mead.  I set a self service bar up on the piano,
leaving guests to help themselves so I could greet others as they arrived,
 before we all headed out to the tent to watch the ceremony.
 Since it was a rainy day, I never got any pics of the tent from this angle, but here you can see how tight the space was for the tent.  Exactly 15'x15' it fit perfectly next to the house, and once inside the tent you would easily see the wedding ceremony because it was raised, much like going to the movies where you can see over the people in front of you.  The tiny black and white umbrella was set up because I had engaged the services of a "live event painter" to paint the event.  So these extra umbrellas were necessary, though not ideal.  However once inside the tent,  they did not take away from the prettiness of the scene. We even purchased a patio heater. because temps dropped for the wedding day to make it the most unpleasant day of the entire month!! UGH.
But as we do tend to be lucky in life, the rain stopped right before the ceremony, and although cool, it worked out well.  Above you can see the table layout and the open tent on the far end revealing the raised lawn where the arbor is located.  My pal Matthew Mead is shooting the couple in the background, as more pics were taken right after the ceremony and before dinner.  
We rented the standard white plastic folding chairs at $2 each, and then laid 2 six foot tables end to end so we were able to accommodate the most people in the space. Two tables of 14 each, which was 4 more than if I had put in four round tables.  I recommend doing a floor plan and allowing 2 feet per dining space, per chair at a table.  
(center aisle space measured 6 feet between tables)
We compromised that a bit on the ends by adding seats at the ends but it worked out fine.  Allow 2 feet per chair to pull out and tuck in, and then another 2 feet for a walkway, so we had six feet of space for the center pathway between tables, allowing for 2 feet on each table side for the chairs, and it was plenty roomy for people to get through the tent.
My favorite part of any dinner party is setting the table.  A small wedding is just like a nice party.  If you think of it that way, you won't be overwhelmed.  I had 20 vintage French napkins with pretty monograms that I wanted to use, and I filled in the remaining needed with plain white cotton flour sack kitchen towels from Walmart, sold in a bundle of 6 for just a few dollars.  They are big like the French linen napkins, often called "Lapkins" because they cover your entire lap.  You could use all flour sack towels and stencil monograms for a very pretty effect. Our color theme was basically white and gold, but we added touches of pink.  I don't like the use of a lot of color in wedding decorations, as I think it can look too strong and garish.  So skip the colored linens and go all white and add accents of color in the flowers, the votives and ribbons, as we did for our napkins.
We cut the pretty embroidered ribbon from Joann Fabrics into strips 15" long to tie around each napkin as a pretty accent.  The embroidered pattern was certainly romantic. The pink glass votives were purchased from Joann Fabrics as well, using their coupons for an added discount.
Four patterns of gold rimmed china dinner plates were mixed and matched from my collection of vintage dinnerware.  I had to buy a half dozen extra gold and white plates at the local Salvation Army Thrift Store to give me enough to set 28 places.  Thrift stores are a great place to pick up things like fancy plates for a song.  This shot was taken while we were setting the table the morning of the wedding.  Mimi hand printed place cards to let the guests know where to sit as well as to lend a formal aspect to the wedding dinner. 
We rented all the stemware from the tent rental company.  The glasses came in cases of 25 for about $11 a case.  After the wedding, no washing, just put back in the case and the tent company took them away.  This was a great thing, as we had champagne flutes, water goblets and wine glasses for each place setting. Just look at the dining tables you see on Downton Abbey, set with so many goblets....the more glasses, the richer looking the table!  Since I had 28 diners, I only needed to fill in the blanks for 3 guests, so we had the wedding couple use my Waterford glasses and our youngest son got the "mismatched" stemware.  No one was the wiser.  
For the flatware I combined my sterling service for 18 with my mother in laws service for 8, then added two services in silver-plate for a very elegant table setting.  One could easily set a table in gorgeous silver plate, found at most vintage and thrift shops for little money.  At home we use vintage silver plate services for our everyday knives, forks and spoons.  (I hate eating a nice dinner with crummy silverware.  It bugs me!)  
 Other details that made the table setting memorable, was adding special seating for the bride and groom.  You could use your own dining chairs adorned with ribbons or a fancy settee, like this one that I have in my dining room.  I added two needlepoint cushions to give it that extra dose of romance.
I painted and gilded the bench to echo their pretty wedding invitation in grey and gold.
It made for a special  focal point for the bride and groom
And at the end of the night....  
Champagne still chilling, half filled glasses abandoned, and other detritus of the night.
Love this photo and the story it tells.
A lot of little details all add up to create a night to remember.
 One of the few pics I stopped to take, as if on the outside looking in. 
 The tent was like a magical tee-pee, making for a memorable yet affordable wedding.
So much cozier than a big ballroom, it was personal and joyful being tucked inside with one another.
We created a fairy tale wedding  
and it didn't cost a fortune.  
Next time,  Part Three
  More details on getting that dreamy fairy tale look and
 the "splurge" I couldn't resist!

 photo signature_zpsxi5q1w6r.png
Read more »