Showing posts with label Furniture Makeover. Show all posts

Thursday, August 1, 2019

Romantic Medicine Cabinet Makeover and favorite Self Tanner

                                   Our master bathroom has an antique French style. 
Created by adjusting things such as the colors of the cabinets and doors, 
adding appliqués and gilding to the closet doors, using vintage  
 hooked rugs and old style chandeliers which I painted gold and enhanced with 
aqua crystals and lastly replacing the laminate counters with marble.
This pretty photo (above) was from the Romantic Country photo shoot
 with Fifi O'Neil two years ago.
Fifi loves to add more, more, more to a space!
She hung jewelry from my towel rack and set pretty towels 
in the wire wall mounted shelf rack. 
 In reality many of my daily toiletries sat on the counter.
As in real life, things are often pretty.
It was actually very cluttered and messy looking.  
But now it looks like this!
 I found an old glass door wall cabinet
created a vintage version of a medicine cabinet to store things.
Of course the cabinet was anything but pretty when I found it.
 I envisioned it in romantic gold and aqua. 
Our bathroom has gold accents which give it a rich old European look.
  I'm back in the swing of rehabbing things with the most beautiful new paint!
This post contains Affiliate links for your shopping convenience.
 Click to read my full disclosure policy.

Jolie Paint is made in the USA and is zero VOC. Yes!
  The colors are absolutely gorgeous!


The wall cabinet was painted in Bliss
 (a green/blue shown top of left column in the Jolie color card).

 I highlighted it with their gold metal leaf and gold gilding wax 
to return it to it's Florentine glory.  Using metal leaf is so simple!  
Jolie has a step by step guide which is flawless, even for a beginner. 
 It made all the difference in my project.
Simply paint a liquid adhesive called "Gold Size" on the 
areas you want to be covered in the gold metal leaf.  
After a few minutes rub sections of the whisper thin sheets of
metal leaf over the adhesive.
Use a stiff but soft brush to remove the excess bits of leaf to reveal the 
highlighted gold leafed areas. 
 It is so amazingly simple!! And soooo glorious looking!
I sanded down the cabinet lightly to soften the feel and give it 
a bit of an aged and distressed effect.
The cabinet had decorative trellis like grooves at the top pediment 
which I highlighted with a tiny artist brush using the Jolie Gold Gilding Wax. 
(One could also have applied the Gold Size in these grooves,
 followed by the metal leaf, but I decided to use
the gilding wax and was happy with the finished look. ) 
Summer Palace by Laura Ashley wallpaper was next,
applied with some tacky spray adhesive on the back wall.
 When the glass doors are closed, it looks extra pretty!
This project only took me two hours to complete.
The Jolie paint and gold leaf adhesive dry so quickly!
 And that self tanner I recently discovered?  
Sublime Bronze by L'Oreal  
These days I never suntan, and haven't for years to keep
skin damage and wrinkles at bay.  However I still have to put on a bathing
suit when we go to the lake cottage, and this stuff is really a miracle of sorts.
 One application is enough to banish the white pasty skin look, 
and two applications have you looking like you just returned 
from two weeks in Monte Carlo and the French Riviera!  
I love how the new "medicine" cabinet looks and functions.
Take a second look around your bathroom and see what simple changes you 
can make to give it a romantic European look.  Changing out the very things
that are already there can be simple using Jolie Paint and Metal Leaf.
Leave me a note if you have tried it, or are planning to.
 I would love to hear about your project!

My blog readers will get 20% off of orders over $200 using this link below.
INF-AMYMAISONDECOR

You will LOVE their paints and enhancements for making over
your furniture and home accessories and creating something beautiful!


Read more »

Friday, March 22, 2013

Using Transfer Gel ~ an Armoire Makeover


This is the "before" photo of the massive Chateau Armoire for sale in the shop.
It is a reproduction piece and had a peachy faux finish coated in a slick poly coat 
that just didn't suit my taste.  I came up with a makeover plan
for this big boy and it was going to be dramatic!
I planned to use my beloved Chalk Paint® of course,
and some new toys from Artisan Enhancements that we 
are excited to have in the shop now.
One of those products is the Transfer Gel and many people have expressed
interest in seeing a step by step account of how it works.
First thing I did was to paint two coats of French Linen Chalk Paint over the armoire.
 Because the transfer gel will work better on a lighter base color
 I painted the panels of the doors with Duck Egg.  My idea 
was for the armoire to have an aged Venetian feel to it~
so while it might look pretty simple
right now, it is not going to stay this way!  I had two images 
that I intended to transfer to the doors,
so I positioned them with a light pencil marking and then applied the 
gel to both the cabinet area where the transfer would be 
as well as to the face of the image itself. 
 Paint the gel right onto the good side of the image, not the white side!
Then position it onto the surface and using a plastic scraper 
(or a credit card) smooth out all the bubbles.  Some of the gel 
will squish out the edges, just wipe it away. You can see the 
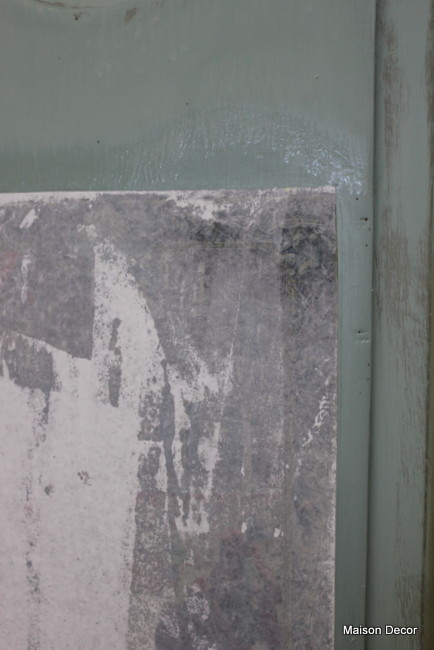
dark areas of the surface that were wet be transfer gel. 
These will end up leaving a tell tale sign called a halo.  
I will address that later~!
 After you attach you images you need to use PATIENCE! 
Wait overnight for your images to dry completely and that means 
do some other stuff while you are waiting like Justin and I did~
we were playing around with 
all the Artisan Enhancements stuff while the day passed into night.
You will see it drying up~even if it looks dry, 
it still needs more drying time.
 Don't rush this part or you will be a sad artist.
The next day I came in early I was so excited...
  I was waiting for Justin 
to get to the store so we could start removing the paper 
from the images together! While I was waiting I started applying some 
other product, Crackle Tex, to the door and I
 will talk about that later too.
It was one more phase of the makeover.
Now we started to remove the paper~
we wet rags that resemble face cloths.
You need to be patient with this part too, 
be very gentle when removing this paper or you 
can scratch it off and have no one to blame but your impatient self!! 
 I used a sponge and Justin used his cloth and his cloth seemed 
to work much nicer than the sponge.  I had warned him 
so he was very careful, more careful than I was in fact!  
I had a few minor scratches and he had zero!
 The paper is wet and starting to rub off with the pressure of the cloth/sponge.
 See the bottom corner of the image is starting to reveal itself!
 You can see the bits of white paper that get rubbed off 
onto the floor or the edges of the wet cabinet. 
 More of the image is revealed with gentle rubbing~
All the pulp is pushed off of the image~do this slowly and carefully.
 Its so exciting when it is almost all finished at this stage.
 Still so much left to remove though.  
More rubbing...
and then when you think it is mostly all gone you 
stop and let it dry for an hour or so and look what happens:
All white paper appears again! 
So you repeat the process but this time  it is more important than 
ever to be tender and careful pulling the last layer of pulp away.  
Often you can just rub with your fingers when it is wet and it will 
roll up under your finger tips.  You can use a mist sprayer or a
 wet sponge and gently rub.  Let it dry again to see if you have 
any areas that still have white on them.  If you don't take it off it 
will mar your transfer~although when wet it looks clear, 
when it dries it can be clouded with white paper pulp. 
So go through this step 2,3, or 4 times to get it all off. 
 This is when I did a little damage~you can see a tear halfway 
on the right at 3 o'clock.  
But I don't care because I want mine to feel old and decrepit! 
 They are finally finished! 
At this point is when you might see a Halo effect. 
 That is a shiny shadow where the gel touched the wood outside of the image.
You can gently sand it back to remove it or you can dry brush
 or paint over it or do what I am going to do~cover it up with a texture.
I am now ready to go onto the next stage~
but if you were going to just do a transfer you could 
stop now and either seal with wax or Artisan Enhancements Top Coat sealer.
 The next step I took was to conceal the edges of the transfer
 so it didn't feel like it was just stuck there in mid panel....
I wanted to give it an embedded look. 
 So I used the Artisan Enhancements Crackle Tex to create a 
crusty cracked film around the image. How to use 
Crackle Tex will be coming up on another post.
 After the Crackle Tex I painted the remainder 
of the cabinet in a soft muddled effect
~dry brushing and washing my head 
off with Duck Egg and Chateau Grey.

 Then I broke out the Gilders Paste creating more of a Venetian feel. 
Purchase Transfer Gel here 


Photobucket
Read more »

Friday, February 15, 2013

Looking for Chalk Paint® and more?

 When you walk in the shop at Maison Decor Malden 
there is no mistake about it~
we sell Annie Sloan's famous bestest paint in the world~!
Chalk Paint®!
 It is now a REGISTERED TRADEMARKED paint~!
We are the ONLY paint that can be called Chalk Paint!!
Pretty darn cool~Annie worked awfully long and hard for the last twenty years
with this marvelous paint she invented~and now that it has found popularity
the wanna be pretenders are comin' out of the woodwork!!
So I am PROUD of Annie Sloan! And PROUD to sell her paint,
as she so fondly calls THE BEST PAINT IN THE WORLD
We sell it in Boston too at 524 Harrison Ave!
 Anyway~so when you walk through our Malden shop door you will 
always find different set ups due to the fact that 
we sell everything that isn't nailed down basically....
but at the moment I have a big sideboard that holds a
 ton of samples done in all kinds of colors and finishes.  
Many shoppers find this helpful to look through to find the
 finish they hope to recreate for their own projects.  
We have all the colors straight out of the can painted on 
wood samples so you don't have to just pick a color from 
a color chart.  If you want to go a little further you can select 
from samples that show things that have been antiqued and glazed and crackled too.
 Now that Annie Sloan has got the official registered trademark 
under her belt she has given us a new logo too. 
 Look for the circle with ANNIE SLOAN STOCKIST on it~
it comes in different colors, but the design is the same. 
 She thoughtfully made it available in different colors to
 fit different shop's decors.  I used some of Artisan Enhancements
 transfer gel to put in on this vintage frame~
 The other stuff in the shop is the latest projects we have using Annie's paint, 
like this fabric and cane backed french chair. I still haven't finished it, 
but it is at the point where it is ready for waxing and maybe something else. 
 The pretty dresser sold and will be headed out of the shop next 
Tuesday making space for new vintage pieces to display.
 While you might run across some home decor items in the Malden shop,
 we are mostly the go to place to see projects of all kinds, 
like painted chandeliers, painted furniture of course,
 and tons of things to inspire the DIYer who is looking for help, 
ideas and answers before they begin their own projects.
 One of the newer things we have added to this shop is the 
Artisan Enhancement line which works nicely with our beloved Chalk Paint®.  
 The Easy Crackle is my latest fav~and I have been 
cracking it up around here!! This is a sample board showing how the 
Easy Crackle reveals the under color of Old Ochre after
 it has been covered in Paris Grey.  I finished it off with 
Clear and Dark soft waxes by Annie Sloan to create an antiqued look. 
 The doors to this music cabinet were given the Easy Crackle treatment.
 They also got a dash of Pearl Plaster for that luminescent pearlized look.
You will get plenty of choices to pick from if you are looking 
to add a little extra character to your painted furniture. 
 Come look at our specialty samples to help you decide. 
That way you don't have to guess what it will look like! 
You can actually handle pieces of decorative wood moldings
 in all kinds of colors and specialty finishes like gilding waxes, 
pastes and the Artisan Enhancement line.
How about doing your closet doors with some Easy Crackle and Chalk Paint®?
I thought the basic white latex painted door would be a good foil for adding Easy Crackle
and then a layer of Duck Egg blue paint....look at the crackly finish!
It adds character to wherever you add it~
I have some clients who are doing  over a set of builder basic hollow core
closet doors in their bedroom right now.  The plan is to make them look like aged
antique paneled doors.  They will be doing Graphite base 
with Paris Grey and Easy Crackle just like my Music Cabinet doors.  
So stop by our shop~its more like a furniture art studio!
This Sunday I will be having an Advanced Techniques class in washes and glazes
with ten ladies~we SOLD OUT in record time....that tells me you guys are looking
to do more with what you have~and its just so easy to do 
with all of these great products and a little know how!
Our next Advance Techniques class will be using the Artisan Enhancements line.
I'll be headed out to Colorado at the end of the month for some one on one
with one of the founders of the company for some hands on learning~more on that later!!
And to wrap it up if you have an extra minute head over to my son Justin's blog,
he wrote about his dear old mom today. 
*blush*
For workshop information and registration go here


Photobucket
Read more »