

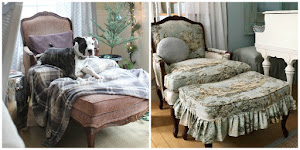
Thats right, a finger tip of patina...a little bit here and a little bit there.
It just brings out the antiquey goodness in a cabinet I think.
This is Gilder Paste in Patina. It mimics the turned copper look.
I like to use it in tandem with a gold color.
The cabinet is in our Workshop area and it holds our workshop supplies.
I painted it in Chateau Grey Chalk Paint® by Annie Sloan.
Then I drybrushed it with Duck Egg Chalk Paint.
Followed up with some clear wax and then I was ready to add some patina.
Literally.

All the moldings got a bit of some Gilder Paste.

I used some Antique Gold Gilder Paste with the Patina.
We sell it online, and I will have a link below. It lasts forever and
I am still on my first container of all the various colors and
I even use them in my workshops!
Just remember to add gilding products after you wax.

Another way to add patina or age is by using paint. This is our lovely little bathroom in the shop. Pretty basic for basic needs...we need to add a bigger sink so we can wash brushes, and I really can't stand the look of a plain jane room~so it got a makeover this weekend.

I started with a ragged wall treatment using Annie Sloan's Antoinette and Coco Chalk Paints. Big swipes on the wall with a paint brush...then a spritz with a water bottle and then rag it in...add a little here and a little there...the next thing you know you have a marvelous looking wall!!! Its so exciting, its easy, and it hardly takes any time! Seriously! I am going to do some walls in my house!

Spritzer bottle, two cups of paint, one chip brush used for both paints, and the only other thing you need is a ladder and rags. When a rag gets really heavy with paint, you will change it out for a new one.

Woah~look at this wall! I LOVE it!!!

I added some little gilded bumble bees with a stencil from the
Royal Designs Studio line that we are thrilled to be carrying now in the shop.
But of course I used my stencil a little bit differently than they show how
to use it. I just placed them randomly about~just a few.

Here is Mr. Maison Decor in his normal attire...workboots and a cowboy hat.
Ibegged asked him if he would help me build a platform for a sink~
an idea I had was to rip off the boards from a wood pallet and make a sink console.
 He was up to the task and after 12 hours it was done...
what a long day that was! Only one period of grumpiness was had,
and then we enjoyed a nice dinner out. We were both starving and although
I was wearing my worst grubby paint clothes, I still walked through the doors
of a restaurant to get dinner. I did make Mr. MD go first so I could hide behind him...
left my pride at the door. When you are hungry you don't care
that you are looking like hell in a baseball hat and paint splattered yoga pants.
He is so much the "ladies first" kinda guy, that it was hard to
get him to walk first as the hostess ushered us to our table.
We both laughed and ordered a well deserved drink.
I
an idea I had was to rip off the boards from a wood pallet and make a sink console.

what a long day that was! Only one period of grumpiness was had,
and then we enjoyed a nice dinner out. We were both starving and although
I was wearing my worst grubby paint clothes, I still walked through the doors
of a restaurant to get dinner. I did make Mr. MD go first so I could hide behind him...
left my pride at the door. When you are hungry you don't care
that you are looking like hell in a baseball hat and paint splattered yoga pants.
He is so much the "ladies first" kinda guy, that it was hard to
get him to walk first as the hostess ushered us to our table.
We both laughed and ordered a well deserved drink.

But I digress....another photo of the wall.
I started decorating the walls while the cowboy was still putting in the sink!
More pics to come showing off the rustic sink console he made for me.
It was so late that I never took the final shot.

We seem to always have three projects happening at once on
any given day at Maison Decor....
This lime wash leather top desk we have in the shop
is getting a makeover that will involve creating patina.

Its bright green leather top sat up on top of all that lovely
washed out wood beneath it, so I decided to balance it out by decoupaging
the panels with Laura Ashley's Summer Palace wallpaper.
To make it feel like it has some age to it, I am working on all the panels
with Annie Sloan's Craqueleur to make the panels have tiny cracks
but that you can see the whole image right through the cracks.

But since its 5 o'clock I didn't finish this project as
we were pretty busy in the shop today.
Hopefully I will get to post it in a day or two,
but this is how it is turning out!
Ok so I showed a bunch of half finished projects...
I promise to get the completed projects up soon!
We are adding a MENS ONLY workshop for the man in your life,
(unless you are the man reading this, I am talking to YOU).
 Justin and Colin will be teaching the guys all the ins and outs of

Chalk Paint and Wax. Oh yeah, its gonna be a great class!
Thanks for coming to the new store, we love seeing the new and old faces.
And of course, thank you for reading the blog!


Looking good..you make it all look so easy and like so much fun! I can see you are having a ball Amy:)
ReplyDeleteI love the paint treatment you did on the bathroom walls! The bumble bees scattered about in gold are just the right touch too. Love the clock faces you added as well. I can't wait to see the final reveal. Such a great idea to add a rustic surround to the sink area.
ReplyDeleteeverything is so inspiring, seeing your facebook post on fabric gave me the idea to do a piece I did yesterday it is just a lil old nightstand but turned out wonderful, love how you finger paint the patina on that is a lovely finish!! have a wonderful rest of your week!!
ReplyDeleteYou are busy, busy, busy. I love the way the bathroom wall turned out.
ReplyDeleteThe bathroom walls are fabulous- I am inspired to paint!!
ReplyDeleteMimi@A House Romance
Your story about dining in your work clothes reminded me of when my husband and I were painting our upstairs and need more paint. We had to scramble to the paint store before it closed, unshowered, in paint-stained t-shirts, totally grubby. We spotted an Italian restaurant in the strip mall across the street. It looked low key, and we were starving, so we slinked in. The hostess definitely raised an eyebrow and seated us in a dark corner of the bar area. Turned out to be our favorite Italian restaurant. We've been back many times, more appropriately dressed, and funnily, we seem to get seated in more visible areas! Best, Beth C.
ReplyDeleteThanks for sharing your work and including the how to and the products. For your ladies first guy, in some places in Europe the man goes first to insure the establishment is suitable and safe for his lady. So still is your gentleman and did indeed protect you. I laughed at " leave your pride at the door", a good reminder. Have a good day! Linda
ReplyDeleteI love this technique, I used a similar one when I aged our bedroom furniture. I am also a huge fan of Design Studios Stencils. I have been using them for years!
ReplyDeleteCynthia
Wow. Love the wall, it turned out so nice. Can't wait to see what else you do in there, (decorating wise) lol Blessings Paula Lusk
ReplyDeleteOoooooo, I love the look of Craqueleur over the wallpaper. I wonder how this would look over an existing wallpapered wall......I just don't think I have the nerve to try it but I have a wallpapered room that is a bit bright for my taste and I think this technique would be the perfect solution to tame it.
ReplyDeleteFondly-Lisa
Love the bathroom wall technique!
ReplyDeleteIt turned out beautifully, Amy.
You just keep going, and going...you are amazing!
Glad to hear all of your classes are filled already. You are an asset to the chalk paint business!!
xo
I'm loving all your transormations Amy! The bumble bees on the wall are just too cute! take care, maryann
ReplyDeleteThe decor is amazing and so well put together. I love how girly it is!! And please do more blog posts like this!
ReplyDeleteAmy I love the paint treatment you did on the walls and love the little bumble bees! Can't wait to see the sink.
ReplyDeleteOh let's not forget that pretty desk:)
Oh my gosh, that bathroom wall with the little bees! I love the way you randomly added them. I can't wait to see the finished bathroom, i hope i didn't miss that post as i catch up. That was a really clever idea with the desk too - adding the wallpaper to work with the green top, and the making it look crackly and old - just perfect!
ReplyDeleteCindy