Saturday, September 21, 2013

Pearl Plaster Croctop Dresser and Workshop!


Pearl Plaster by Artisan Enhancements has been flying out the door at our shop.  
This dresser might be why!
I created a crocodile surface using the Pearl on the top of this dresser
 using a croc stencil that we carry in house as well.
 Its very chic!  
Pearlized and luminous, the top has a dimensional raised crocodile surface now.
 Colin took my photo as I moved the stencil along the
 top of the dresser and applied Pearl Plaster over the stencil using
 a flat rubber spatula.  Pressing the Pearl through the stencil and smoothing it, 
but leaving enough to have a layer with dimension. 
 Here is the top one third of the way done. 
 I had dry brushed pearl lightly over the surface of the dresser 
before I did the stenciling so the effect would be a bit softer 
and have more dimension.
Closeup of the Pearl Plaster stencil in progress.
This would be getting a dark wax finish when done.
 After the stenciling was completed and the Pearl Plaster had dried, 
I used Annie Sloan's clear and dark wax on the surface.
This dresser looked amazing!! 
We set up an elegant european style vignette just for her.
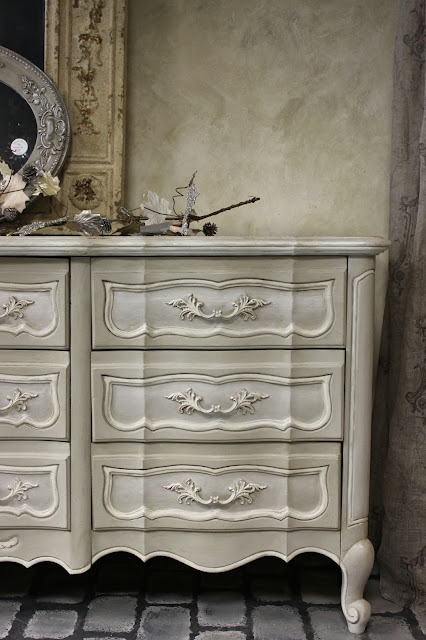
 On the drawer fronts you can see the insert areas were done with the pearl plaster
in a straight application, not using a stencil.   
We use the Pearl Plaster straight out of the jar in a dry brush fashion.
The top of the dresser took one 8 oz jar to complete the project.
So do you want to take your piece of furniture to another level?
Try some of our Artisan Enhancements products.
Here are some samples to show you
 the different effects you can create.
We love Pearl Plaster!
To purchase Pearl Plaster and/or the CROC stencil 
at my online shop CLICK HERE

Photobucket
Read more »

Wednesday, September 18, 2013

Randomness from Home and Shop


 Seems like Wednesdays are going to be my day off from work, which might just translate into me having the time to get a morning blog post put together.  Life around here is on a hectic pace and it doesn't show signs of slowing down anytime soon.  However having a day off means I can schedule a hair appointment, catch up on household bills and throw in some laundry.  We all have Sundays off so that is the day I try to do the food shopping before the football game game comes on.  We do love our New England Patriots and I like to cook chili or wings or both.  Anyway we get new items in the shop every week, and these embroidered linen owl pillows just came in yesterday! They are really cool! One is mostly in greens and greys and the other is in tans beiges and rust.
 See our leopard chair with the tan owl?  
And see the orange side table? 
Its our Moroccan table in Barcelona Chalk Paint®.
We created a masculine vignette using a lot of our newer accessories 
including rustic wood pedestals in two sizes and some grey terracotta capital pedestals.  
A great little collection of dog statues in washed grey sit on the pedestals.  
We threw in a few of our old color coordinated vintage books to round out the setting.  
Oh and a big grey clock...I love how it turned out!
   I am a big dog lover and was so pleased with this dog statue collection.   
 Just been really digging grey mixed with natural browns and tans 
in home decorating.
 Here is a mixed vignette around a great old chest in black and green that Justin styled.
World traveler bits with vintage farmhouse accessories....
.mix it up and just repeat the colors in your accessories to get a pleasing effect.
 A grand trumeau mirror arrived yesterday as well~
this is a reproduction with a good price point.  
You know I love most things French, and this mirror delivers!
 On the home front, Justin and Madison moved into our basement apartment.  
It had been slowly getting filled up with junk Daves stuff.  
We cleaned it out bit by bit
and the last remaining area was the living room space.  
So on Sunday, our day off, the guys 
got together and moved all the stuff out and sorted it and put it away
 in the garage and all
of a sudden Justin and Madison had a real place to live!! 
They already started painting the walls 
and have settled on a mink brown and white color scheme.  
I think I will get Justin on here to guest post about all of the changes 
that they are making~he has a defined style of decorating 
which is pretty cool. You got to see it in the Boston shop, 
and so you can imagine which direction he is going with his new pad. 
 Madison and I offer our opinions, but its clearly his project 
to turn this space into a home for the both of them!
 Cannot wait to see it finished.  
Looks like Sundays will be the day for getting projects done.
 Last night was Colins 22nd birthday, so we do what we always
 do on family birthdays, no matter your age~we head to Polcaris 
for a pizza, fried calamari and salad.  Being a Tuesday night 
we thought we would walk right in...but apparently it is Kids Night!  
 And there was Jenny the Juggler in the house!
Before long she wandered away from the really little kids 
and came to our table and whipped up a proper birthday hat for Colin.  
 It was hilarious! 
And Colin is such a great sport and takes everything in stride as he always does
 and was quite comfortable wearing his balloon hat.  
The amazing thing was how quickly Jenny could blow up a long skinny balloon. 
 They are impossible to blow up.  She would blow one up in 3 seconds flat!  
You can see Justin is holding one and took on the challenge of trying to blow it up.
 Justin blew and blew and blew....his cheeks got as big as chipmunks on steroids 
and his face got beet red.  Finally he got one blown up, 
but he felt like he was having an aneurism!! Mr. Maison Decor 
tried in vain and said he thought he might have dislodged a polyp in his throat!! 
Hahh! We were well entertained by the balloon blowing at the table. 
 It was a very fun party I have to say, and Colin is really grown up 
if he is willing to hang with his family on his birthday, wouldn't you agree?
 This morning I was out in the garden, the air is turning cooler 
and I had to wear a jacket as I took the dogs out for a quick walk.  
A couple of tomato plants Justin put in late in the season after 
he moved here  are hopefully going to get the chance to have
 the fruit ripen before a killing frost.  Next year he wants to 
put in a larger vegetable garden, which would be very nice.
Finally, a shot of Dillon and Tobey out on our walk.  
I love my dogs.  Sylvia the schnoodle lives in the basement apartment
 and we won't see her til the end of the day when she comes upstairs to
 hang out with us all after work day is done.  
So thats it from the Maison Decor home and shopfront for a week in September!  
Oh and the last bit of news:
We are now shipping Chalk Paint® decorative paint by Annie Sloan
 as well as the Soft wax.
I believe we have every color in stock in quarts
 at the present time, along with the wax.  
You can check it out at shopmaisondecor.com 
and get the lowest pricing available in Chalk Paint!
Photobucket
Read more »

Friday, September 13, 2013

Our new Deluxe Maison Decor Mora Clock


 The Deluxe Mora Clock.  
As big fans of the Mora clock style, you might know
we have been painting and customizing our 
famous reproductions at Maison Decor
for many of you who love these clocks too.
 Essentially the same floor clock model as 
our original floor clock reproduction,
the Deluxe Mora clock has an antique Mora style face and along 
with a customized monochromatic paint job with a heavy antiqued finish, 
it's a pretty compelling version of a real antique Mora clock!
 Justin has worked on this clock for the past week and when 
he brought it home from the warehouse
 I couldn't believe how fabulous it looked!
 Its as good as it gets!
 Creating the face takes time but its worth it! We loved the result! 
It might just have to take the place of my wall clock that
 I did a few years ago and have loved it ever since the day 
I hung it in this spot.  We have customized colors 
coming for the Deluxe collection.
Shown is Gustavian Grey.  Looking forward to completing
 more of these beautiful clocks in the weeks ahead in our
 new colors of FadedAqua, Pale Blue and Classic Antiqued White. 
Our original Maison Decor Mora floor clock's numbers on the face 
are done a different lettering style for the face.  
This is the biggest difference between the Original Mora and the Deluxe, 
along with the extra hand finishing on the face as well as
 the heavy antiquing found on the Deluxe. 
We hope you like the new look of our latest clock!  
You can find these on our website at shopmaisondecor.com 
Wouldn't this make a great surprise Christmas gift?  
We are already taking orders! As each newly offered color gets
 completed on a clock, we will be taking pics and then adding the 
photos of the various painted Deluxe clocks to our online shop. 
 Please email us with any questions about our lovely clocks. 
We still have the Maison Decor wall clocks available as well.  
This one above is finished in Faded Louis Blue and Old White.
And below was the first clock I ever painted!  Its also a Faded Louis Blue
with tons of antiquing....but now I think I might just need to have my 
own Deluxe Maison Decor Mora Floor Clock!
Click above photo to shop at Maison Decor
Photobucket
Read more »

Wednesday, September 11, 2013

Painting Kitchen Cabinets with Chalk Paint® by Annie Sloan


 This post is all about how to paint your kitchen cabinets 
with Chalk Paint® decorative paint by Annie Sloan.  
How would I know?
 Because I painted mine over four years ago and loved the result!
When I had a retail shop selling Chalk Paint, I was advising people
 on a weekly basis on how to go about painting 
kitchen cabinetry with Chalk Paint.
This before photo shows my cabinets in Maple with a polyurethane finished.
I washed the cabinets using Pinesol detergent and wiped them dry.
No sanding at all! 
If your cabinets are very shiny then you might give them a light
sanding, but normally this is not part of the process.
As a matter of fact when you sand you could be removing the finish that
helps seal any wood tannins so be sanding you could be exposing yourself
to having stains come through your paint job called bleeding.
If this happens to your cabinets, stop painting and apply Zinsser Clear Shellac.
One light coat of the clear shellac should be applied.  
I did not shellac or sand.
 I just started painting as soon as the cabinets were dry.  
We recommend using an Annie Sloan Paint Brush for this big project.
Get the right tools and along with this great paint and wax
 you will be pleased with  your results.  
So what tools do you need for the job?
A great paint brush! 
These brushes are natural bristle brushes and
 that is what you need, first and foremost.
The paint will load up into these thousands of bristles
 and you won't be going back and forth
between the can of paint and cabinet. 
These brushes have very fine soft bristles which minimized 
the appearance of brush strokes as well, another added advantage!  
The cabinets were painted with two coats of Old White Chalk Paint.
I painted mine while they hung in place, after removing hardware.
After painting the first coat I began right away on the second coat. 
Have a cup of water handy and dip the tip of your brush
 into the water then into the can of Chalk Paint.  
This helps the second coat glide on and not grab onto the first coat.
It also helps smooth out the brush strokes. If it feels like its grabbing, 
just dip your tips into water and paint and you will feel the difference as you paint.
After you cover the cabinets with two coats of Chalk Paint® we 
recommend waiting a day before you wax your cabinets. 
Annie Sloan Soft Clear Wax is formulated to go with her paint. 
 It will not yellow as many protective top coats do,
so you rest assured your white will be white forever!
The wax is needed to create a durable finish so this step is a must.
Apply the wax with a wax brush for best results.
A large wax brush is going to get the wax onto your cabinets, 
and into the paint. This is about the amount of wax you should have
 on your wax brush. You will push the wax into the painted surface
 using a good amount of pressure. I go in a circular motion and finish off
 with straight strokes making sure I get the wax into the paint. 
 Then take a soft t-shirt or other lint free cloth and wipe off any excess amount of wax. 
 You can see if you have too much wax on your cabinet by 
running your finger across the surface. If you see a smear mark, 
there is too much wax so wipe it off with a rag. Do not rub briskly
 with a rag, as that is buffing and you could remove the wax entirely
 in sections by brisk rubbing.  Just gently but firmly drag a clean cloth 
across your waxed surface and move on to the next cabinet to wax. 
We wax in sections and wipe off as we go.
 Do not wax the entire kitchen cabinetry and then try to wipe off 
or you will find it very difficult to do so as 
the wax has already started to set up and dry.
 Since I was painting and waxing my cabinets at home alone 
I don't have a photo showing me doing the waxing, but here you can 
see how I am waxing a hutch.  I have a firm grasp on the base of the 
brush so I can push the wax into the painted surface.  
The brush does a great job of going over all ridges and details, 
even your hardware if you choose to paint those.
 Annie Sloan Soft Wax is just that~SOFT!  
It will spread easily and many use too much wax because
 it is easy to overload your brush.  
So just add small amounts by tapping the brush into the can.
  Above you can see our can of wax is getting near empty, 
and the brush is sitting straight up in the can.
When you are finished waxing we recommend washing your brush with 
hot water and Dawn dishwashing detergent.  No soaking.
 Towel off with paper towels and let air dry.
We have been doing this for years with zero bristle loss and great results.
However we don't wash our wax brush after every use, 
we store it in a Nitrile surgical glove to 
keep it moist for the next waxing job 
and it can stay in there for weeks at a time.  
If you want to lightly or heavily distress your cabinets
 you can do so before or after waxing.
Annie likes to do it after waxing as it eliminates any dust from sanded Chalk Paint®.
But then you must reapply more wax after sanding.   
I distress first, after  my paint has dried, 
and before I wax so that way I am only waxing once. 
After distressing I will apply the wax.  
A fine sanding block was used to lightly distress my cabinets.  
Painting your cabinets is a do-able project and one that offers great results.
It took two quarts of Old White Chalk Paint® to do the outside of my doors.
If you are doing the inside of the doors you will use double the amount.
Each can covers about 150 square feet of coverage. 
I used a little more than one can of Clear Wax for the doors. 
 Think about using two coats of wax on the doors or 
drawers that get the most use for added protection.
My kitchen is now over  four years old and I haven't re-waxed them 
yet but I will be doing that soon.  If you are wiping down your cabinets 
you are effectively removing wax 
a tiny bit at a time so re-wax your cabinets accordingly to keep them protected, 
especially the cabinets used most often, like the coffee cup cabinet, 
or the one for the silverware etc.
When the paint and wax have been applied it is time to buff your cabinets.
We use the Ultimate Buffing Brush and give our pieces a beautiful lustre by
running over the waxed surface with the brush.  
Its quick and easy!
You can also buff with clean soft cloths, taking care not to 
scratch your surface with your fingernails as I have done 
when rubbing the cloth quickly back and forth.
Remember to wait at least a day to buff your cabinets.
Paint, Wax, Buff!
 Thats it!
Create the kitchen of your dreams with Chalk Paint® by Annie Sloan!


Photobucket
Read more »