Tuesday, August 13, 2013

Adding Patina and Ragging Walls

Thats right, a finger tip of patina...a little bit here and a little bit there.
It just brings out the antiquey goodness in a cabinet I think.
This is Gilder Paste in Patina. It mimics the turned copper look.
I like to use it in tandem with a gold color.
The cabinet is in our Workshop area and it holds our workshop supplies. 
I painted it in Chateau Grey Chalk Paint® by Annie Sloan.
Then I drybrushed it with Duck Egg Chalk Paint.
Followed up with some clear wax and then I was ready to add some patina.
Literally.
 All the moldings got a bit of some Gilder Paste.
I used some Antique Gold Gilder Paste with the Patina.
We sell it online, and I will have a link below. It lasts forever and 
I am still on my first container of all the various colors and 
I even use them in my workshops!
Just remember to add gilding products after you wax.
 Another way to add patina or age is by using paint. This is our lovely little bathroom in the shop. Pretty basic for basic needs...we need to add a bigger sink so we can wash brushes, and I really can't stand the look of a plain jane room~so it got a makeover this weekend.
 I started with a ragged wall treatment using Annie Sloan's Antoinette and Coco Chalk Paints. Big swipes on the wall with a paint brush...then a spritz with a water bottle and then rag it in...add a little here and a little there...the next thing you know you have a marvelous looking wall!!! Its so exciting, its easy, and it hardly takes any time! Seriously! I am going to do some walls in my house!
 Spritzer bottle, two cups of paint, one chip brush used for both paints, and the only other thing you need is a ladder and rags. When a rag gets really heavy with paint, you will change it out for a new one.
 Woah~look at this wall! I LOVE it!!! 
I added some little gilded bumble bees with a stencil from the
 Royal Designs Studio line that we are thrilled to be carrying now in the shop. 
But of course I used my stencil a little bit differently than they show how
to use it. I just placed them randomly about~just a few.
 Here is Mr. Maison Decor in his normal attire...workboots and a cowboy hat.
 I begged asked him if he would help me build a platform for a sink~
an idea I had was to rip off the boards from a wood pallet and make a sink console. 
He was up to the task and after 12 hours it was done...
what a long day that was! Only one period of grumpiness was had, 
and then we enjoyed a nice dinner out. We were both starving and although 
I was wearing my worst grubby paint clothes, I still walked through the doors 
of a restaurant to get dinner. I did make Mr. MD go first so I could hide behind him...
left my pride at the door.  When you are hungry you don't care 
that you are looking like hell in a baseball hat and paint splattered yoga pants.  
He is so much the "ladies first" kinda guy, that it was hard to
 get him to walk first as the hostess ushered us to our table. 
We both laughed and ordered a well deserved drink.
But I digress....another photo of the wall.
I started decorating the walls while the cowboy was still putting in the sink!
More pics to come showing off the  rustic sink console he made for me. 
It was so late that I never took the final shot.
We seem to always have three projects happening at once on
any given day at Maison Decor....
This lime wash leather top desk we have in the shop 
is getting a makeover that will involve creating patina.  
Its bright green leather top sat up on top of all that lovely 
washed out wood beneath it, so I decided to balance it out by decoupaging
 the panels with Laura Ashley's Summer Palace wallpaper. 
To make it feel like it has some age to it, I am working on all the panels
 with Annie Sloan's Craqueleur to make the panels have tiny cracks
 but that you can see the whole image right through the cracks.
 But since its 5 o'clock I didn't finish this project as 
we were pretty busy in the shop today.
Hopefully I will get to post it in a day or two,
 but this is how it is turning out! 
Ok so I showed a bunch of half finished projects...
I promise to get the completed projects up soon!
 We are adding a MENS ONLY workshop for the man in your life,
(unless you are the man reading this, I am talking to YOU).
Justin and Colin will be teaching the guys all the ins and outs of 
Chalk Paint and Wax. Oh yeah, its gonna be a great class!

Thanks for coming to the new store, we love seeing the new and old faces.
And of course, thank you for reading the blog!

Photobucket
Read more »

Thursday, August 8, 2013

Accessorizing a room, stencils, and stunning furniture finishes.

Accessories make a room.
At least thats what I find most of the time~and it seems to be 
the hardest thing for many to do well.
I accessorized this space for a client of mine after we nailed down
the room layout and got the furnishings and draperies in place.
Working with HomeGoods selection of many different styles
all in one place makes the job of accessorizing pretty easy.
I always try to buy more than I need so I have options when I go
to do my tablescapes.  You can always return what you don't think works
later on, but the more you have to play with, the better your results will be.
So tip #1~buy more than you need.
This is the before photo~not bad, but it is not very interesting.
compared to the photo above after I accessorized the space.
This area is in Heather's living room behind the sofa. It is a nice
place to pay some bills, set up the laptop, and look out the back window
while the dog runs around after the kids.
A selection of topiaries from HomeGoods in grey terracotta pots add softness. 
Use faux or live greenery like this to add a little life to your vignettes.  I also
grabbed this yellow chevron tray~its covered in fabric and its a nice way
to layer some more pattern as well as give a place for Heather to throw her daily mail.
A pair of vintage lamps and a cute little clock from my shop rounded out the desktop.
The other piece of furniture in this area is the vintage 
fall front desk that I found for Heather. 
A nice big Paris clock fits the french lines of the desk and is the 
the right shape for above the desk.  More artwork would have 
competed with the large painting over the console desk.
Another HomeGoods cache of accessories included a topiary, 
large faux pear, pineapple finial in rustic gold,
 a rococo photo frame in antiqued gold and a few other goodies
that look cool on a desk like a notebook with metallic chevron and zebra stripes.
When Heather entertains this fall front will switch roles and become 
a serving bar for mixing up a few cocktails!
Love a multi-purpose piece with style galore.
Try putting pieces on top of old books for an easy decorator look.
I rip the book jackets off of my hardbound books and then organize
them by color and then use in rooms for accents pieces.
Books look great with everything.
We used lots of shades of green and black through out the room.
 Don't forget to check the clearance items too~
this neat terrarium container was a steal.
I filled it up with green moss balls and then added a pile of
rustic wooden pencils to a garden motif ceramic plate,
all found at HomeGoods.
You can see the desk area behind the sofa~now the room has
got personality and its largely in part to the accessorizing!
So get out there and fill up your cart~you will have a "Happy by Design"
 result after adding some coordinated accessories to your rooms!
You can check out my Pinterest boards by clicking on the poster above
and see the HomeGoods board as well as my other boards and I think 
you may find much decorating inspiration there.
On the Maison Decor store front at 150 Main Street Reading, Mass we have 
just added the Royal Design Studio stencil collection.
Colin got our display up and running and we have so many to choose from~
Chevrons, Animal prints, Damasks, French motifs, Numerals, Moroccan and more.
We also got our Artisan Enhancements display finished as well.
This Rustic Chateau console has lots of layering and its got that
glamorous rustic look with a touch of gilding that I favor.
Justin used Crackle Tex and Finestone on this piece after Colin got the
base coat of Antoinette down. Then after Crackle Tex we added Country Grey
and Justin worked the crackley crud peeling magic on the console.
I finished it off with a dark wax glaze and a touch of Empire Gold gidling wax.
A real collaborative project with all 3 of us taking part.
Hint of pink Antoinette Chalk Paint® by Annie Sloan hides
 under the Country Grey layer on top.
See the itty bit of gold on the edges? 
The Antoinette pulls out bits of pink in the marble top.
Marie Antoinette would have loved this piece!
Artisans Enhancements were used to do the Rustic Chateau console as 
well as the French Provincial Pearl dresser below.
And thats the latest from Maison Decor!
Post Script~
For those of you interested in our August Chalk Paint Intro
class, there are only a couple of spots left for the 8/18 class.
Register online at shopmaisondecor.com


Photobucket
Read more »

Monday, August 5, 2013

I'm working for Home Goods!

Don't worry~I am not leaving my career at my store Maison Decor!! I was invited by HomeGoods to be one of ten national designers to represent them in a new campaign that will be shown on their HomeGoods Pinterest board "Happy by Design".

I will be pinning for HomeGoods for the next several months to start~so here is my debut.  First order of business was to go shopping at HomeGoods and get some good stuff. Here is my shopping cart last Sunday loaded to the gills at my local HomeGoods.  I was working with a client, Heather, who needed some finishing touches to her living room~so this would be the perfect opportunity to help her out and get some great pins for HomeGoods.
I started with Heather this spring~she got a lot of furniture from her 
dad and was looking for a way to make it work for her and her family. 
 She and her hubs have two kids not yet in high school~
so they are active but past the age of breaking stuff left out on table tops. 
Heather centered the sofa across from the fireplace but it was not lined up
 between the windows and that made for an awkwardness.  
I suggested a new floor plan that would divide the room into two zones. 
Then we would eliminate the bossy carpet and paint the dark furniture with Chalk Paint®.
We stayed with a neutral palette and the plan was to 
use color in the accessories for the room.  
The console is in its original mahogany finish.  
Looking very New England traditional don't you think? 
Well wait 'til you see how this area came out!
 We offer custom painted furniture services at Maison Decor.
 I painted Heather's console Country Grey in Chalk Paint® by Annie Sloan. 
I added some gilded touches to make sure it fit with the more formal mirror.
 I also painted the coffee table in Chateau Grey Chalk Paint® by Annie Sloan. 
Its a rich grey green color. We lightly added dark wax for a more aged appearance.
We replaced the carpet with a sisal style rug with green cotton binding.
 Of course this room was not going to be shabby in decor, 
I had something more transitional in mind.  
French touches but also a fun light feeling that fits a younger vibrant family.
Now the furniture is in the proper place, the neutral draperies are hung from simple iron rods,
and the room is just waiting for its finishing touches.
As I said earlier, I divided the room into two zones, and behind the sofa 
sits this ladies desk.  Against the wall is a wonderful french style fall front desk
that adds some height and will be used as a bar area when they entertain.
Heather got the ball rolling by finding this fabric to recover her chair and 
that pattern became our inspiration point for color and feeling in the room.
It's a Richloom fabric with a confetti of colors in a suzani style print. 
Some custom made pillows with down inserts were whipped up by yours truly.
These pillows were going to be the perfect thing to bring Heather's room to life.
 The living room~very nice but on the bland side. 
Lets get a pop of color going on, shall we?
Bam! Lets start with the pillows~that led to the lamps!
We love the transitional look these lamps from Maison Decor brought to the room.
Lamps are always a great way to change the look in a room.
A pair of leather trunks from HomeGoods were 
added under the console to play down the formerly formal spot.
 By using several shades of  fabulous lime green we were 
able to marry many of the different greens in the room.
The faux pears and fun serving tray were additions from HomeGoods.
Finally the full view of the living room seating area!
Its fun and fresh and inviting!
What a difference the right accessories can make in a home.
Next time we will take a look at the before and after of the 
second seating area in the living room where the desks are placed.
Hope to see you at our new home decor store in
Reading, Mass at 150 Main Street!
We will hook you up with design help and advice
as well as give you a quote on custom painted furniture.


Photobucket
Read more »

Friday, August 2, 2013

Making more Beautiful! Frottage, Classes and Accessories


Would you like to learn how to do a paint technique called Frottage?
The entire wall along one side of the shop is our vignette wall. 
This is where we do certain paint techniques, like Frottage.
My sons were busy creating a vignette around this Paris Grey dresser,
and the next space would be done using a technique called Frottage.
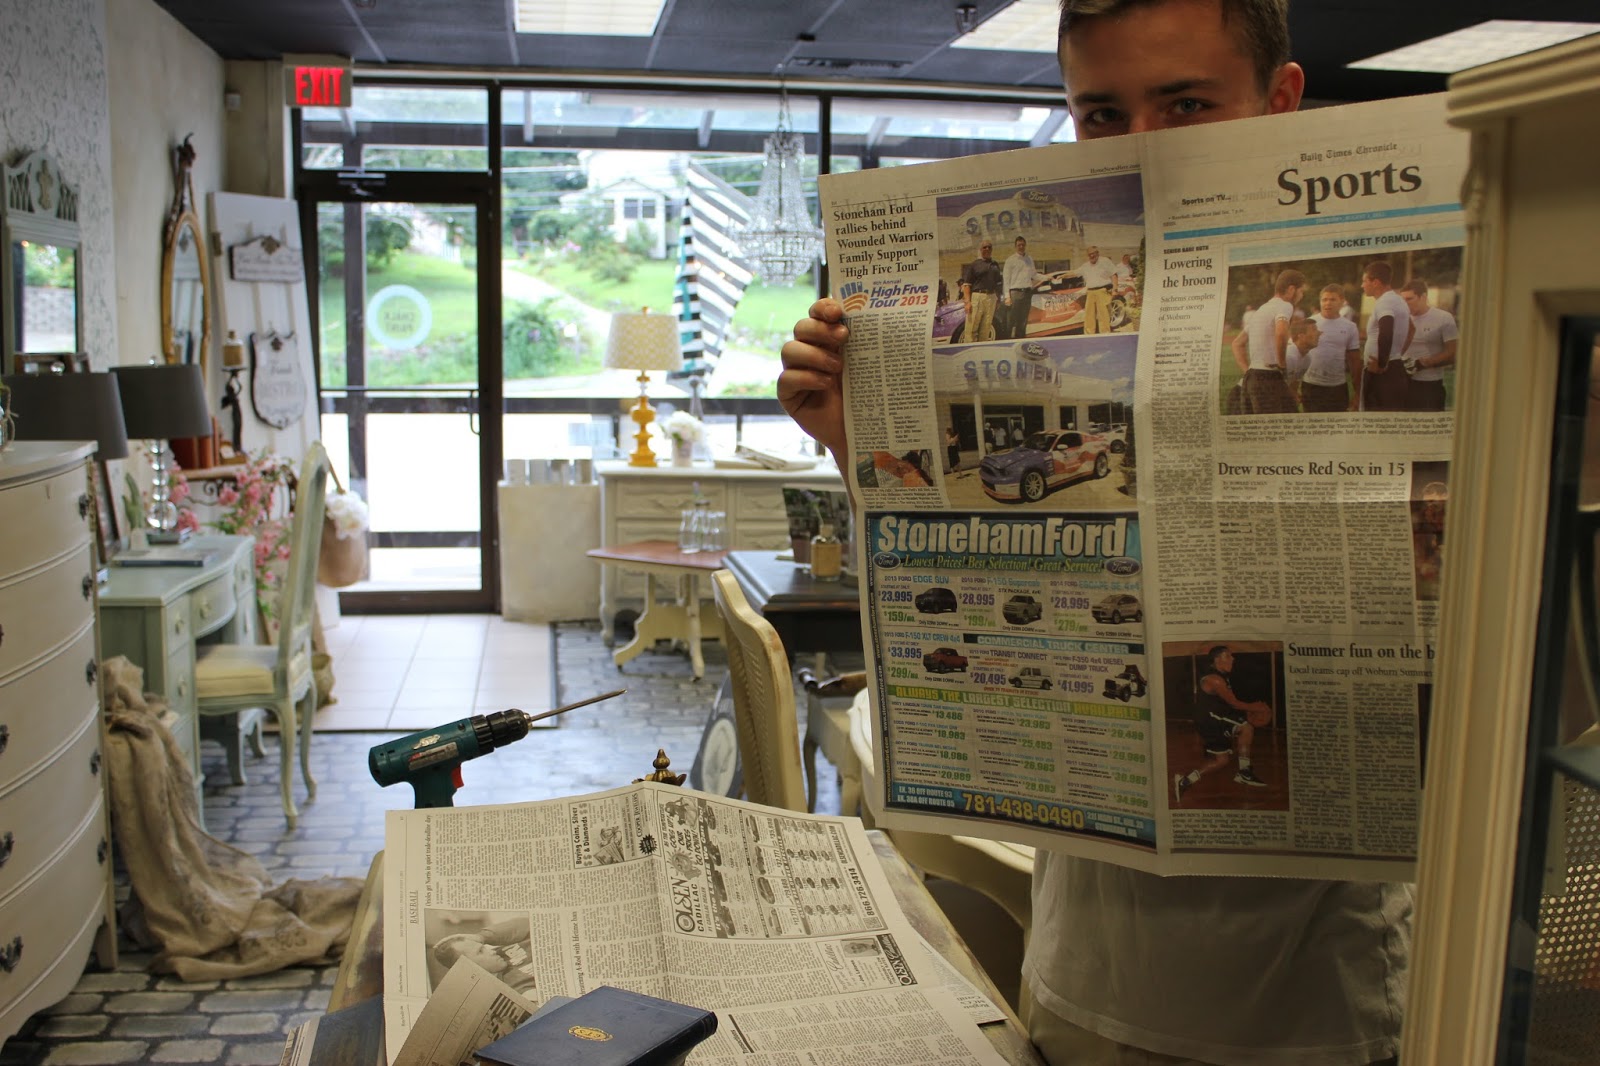
First get some newspaper!
This technique, Frottage, is from Annie Sloan's newest book, Colour Recipes.
 The guys did a base layer of Coco Chalk Paint. 
Very quickly they rolled on a thinned out layer of paint.
The first coat was on the wall. 
We wanted to have a green color and a two tone layer, 
so we started with Coco Chalk Paint.
 Then a layer of Chateau Grey Chalk Paint was applied. 
 I told Colin to put on gloves as I thought it was going to be really messy,
however it was not. So you don't need gloves to do this!
 While the Chateau Grey was wet Justin took sheets of crinkled newspaper 
and rubbed it all over and then pulled it off. The paper pulls off some of the 
paint revealing the under layer.  It was a quick and easy technique that gives 
a rustic look~just what we were looking for!  
 This is how it came out after we added the furniture and some accessories.
 Justin kept adding pieces until he got the Vintage Library look he wanted.
How about putting old books in a garden planter?
We loved how the Gilded antique frame turned into a chalkboard
 looked against this Frottage wall! 
 We have a fantastic space for our classes and our first
 Chalk Paint Introductory class was held last Sunday with a sell out group. 
Learn how to make your pieces more beautiful!
Its fun and exciting and I have seen amazing results from my students.
(Note: Maison Decor is no longer open for business)


Photobucket
Read more »