Welcome to my tutorial blog post on how I reupholstered this second hand
French Provincial arm chair. I took lots of photos at some points, and less at other
points during the process, but hopefully this tutorial will inspire you to give it a try
and not be intimidated to attempt reupholstering. I have never tried it before, and when
I scored this chair at an antique/vintage shop, I didn't love the fabric, although there
was nothing wrong with it. After giving it some thought I didn't see why I couldn't just go
over the existing fabric with the new fabric. So that was my plan, and the only thing I
will tell you is that you must buy or rent a pneumatic stapler that gets powered from being
attached by a curly stretchy cord to a small compressor. This nailer/stapler will shoot the
staples into the hardest of wood with barely a squeeze of the trigger. The staples are tiny
and I used a 3/8" size staple for this project. A regular stapler will not work.
For fabric, I ordered 7 yards of a toile (note: this was plenty of fabric for both pieces) which I figured was going to be very easy to use, pattern wise. Stripes and checks would likely be harder as you have to kind of pay attention to matching the pattern when you put it on the adjoining sections of the chair. This chair would be kind of easy to do because its parts were all like little islands that would have their own pieces of fabrics stapled onto
the independent sections. So here we go~lets get this thing upholstered!
Here is the chair, and is shown after I took the seat cushion off of the chair.
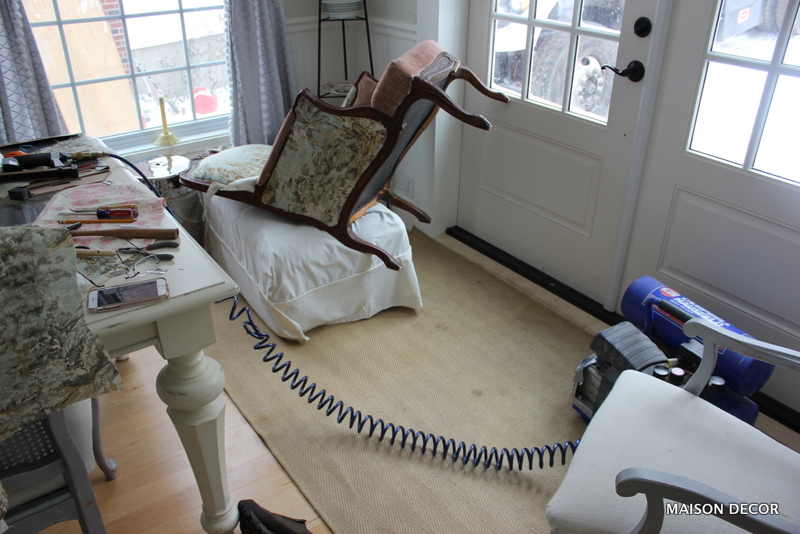
This is a photo of the compressor and the nail gun. It plugs into any household outlet. You will see Colby in a lot of these photos as he was relentlessly watching and sniffing around as I did the project.
When I bought the chair, it had never been finished with the cording or trim that would normally have been attached to hide the staples. This was what really inspired me to think about just stapling more fabric on top of the existing fabric. See the tiny staples? They are all along the border of the fabric. I will leave them there and just lay some fabric over it and do the same thing. But I decided to start on a less conspicuous area in case it was harder than I predicted. If you have a chair that you want to do this to that does have the cording or trim covering the staples, then pull it off and remove it using pliers or just pull it off. Then you will be able to start at the same point that I did on this tutorial.

I cut a piece of the toile and laid it over the side panel of the chair. Then I put in a staple at the middle of the top and bottom, and left and right borders to center and anchor the fabric. Then I just started firing staples in a row a few to the left, a few to the right, a few up and a few down...
Give yourself a few extra inches of fabric all the way around so you won't be short. This was my first panel that I stapled and one side was very close to the edge, and it was too close to comfort. I cut the rest of the pieces a bit larger after that. Here you can see the staple gun nose hitting the fabric. I can feel the wood border of the chair frame and by running my finger over the fabric, I can feel where to fire in a staple.
After putting in the staples, which are side by side, you will trim off the excess fabric as close as you
can to the staples themselves. I started off using scissors to trim, but switched to a straight edge razor
to get a close trim job.
And just like that, the first panel was done, and it only took about ten minutes!
See how the fabric is trimmed very close? Its a bit ragged looking but this will all be covered with a decorative flat braid called gimp, which will be applied with glue.
The fabric is nice and smooth and held in place by one million staples on the edges.
Now that I am feeling confident, I cut a piece of fabric for the center back. I wanted the toile pattern to be featured on the back, so I cut it out accordingly. Solid fabrics would be the most simple to do of course. I fired in a staple at the North South East and West points on the border and then worked out from there.
Here you can see there are more staples along the sides than there are at the top and the bottom. I did the sides a bit more, next did the top border and then finished the bottom border along the chair frame.
After all is stapled along the edge of the frame, you trim off the excess with your razor or scissors. I laid the chair on its back on top of an ottoman so I could work on it with ease.
I had a few tools on the table, which I didn't need to use often. A needle nose plier helped pull out any staple that didn't go in all the way, or bounced back leaving a sharp end exposed. I also had a tiny tack hammer to pound in any staples that didn't go in as far as they should have.
I did the small area on top of the arm, which was super fast. Then I did the inside panel. See how the fabric is just laid over the arm? I am deciding where to trim it so get the pattern where I want it.
Then I started stapling the borders. I recommend putting a staple in at the top and bottom borders to anchor the pattern, and then again on the left and right sides if it applies. After that you can quickly just start stapling the rest of the border until finished, with your staples side by side.
For this area in the "armpit of the chair" where the joint meets and you don't see a wood frame, feel in the area with your fingers to see where the wood frame is hidden in the recess. Then push your fabric into the crevice, but turn an inch or so back on the fabric (look at next photo) and shoot a staple in there. Easy peasy! Anything that seems to make sense is probably sensible, so I followed my gut on reupholstering this chair whenever anything wasn't clear as a bell.
Some areas that wouldn't have gimp trim will need you to give it a finished edge, and you can do this by simply folding the edge of the fabric underneath before you staple it in place.
Then continue stapling...
Then trim off the excess. See the pink fabric underneath? Its going to be ok, because that will be hidden with the decorative gimp trim.
Sometimes I used scissors, sometimes the razor, to trim the fabric.
Woohoo! Look how fast this thing was getting done! It really was moving along quickly.
I finished all the little panels and now I had to deal with how to upholster the decking area.
The decking is the area that is hidden under the seat cushion, but then there was the part that was upholstered and attached to the frame. I made a three section piece of fabric to fit this area, and I would say that this was the most difficult part of the project, as it involved the sewing machine and doing some fitting. I will try to explain it as best I can to you. I know how to make slipcovers and so the technique here uses some of that know-how.
Lay the fabric ( I kept mine on the bolt so it wouldn't wrinkle) across the front part of the chair, and in doing so, I knew I could cut a piece straight across that would fit from where the arms join the deck to the front of the chair where the fabric gets attached to the frame. Each chair will be different and you will have to devise your own home made pattern to how to cover your decking area.
After cutting a length of fabric, I turned it face down and got my pin cushion and created darts at the right and left hand edges/corners of the chair. A dart is just making a triangle to take up the extra fabric so you can turn the corner with ease.
This is a dart. I pinned from the corners to the edge of the fabric and it got wider as it moved away from the corner.
Colby was in the mix all along the way, so if you see Mr. Pumpkin Head chewy toy in my shots, that is why.
This was the right hand dart I made to fit the fabric to the edge of the chair.
Here are both darts pinned. Just pin up the excess fabric and then repin it if you feel it doesn't seem to fit correctly. This is something I learned to do in junior high school sewing class making simple clothing, like A-line skirts. Don't get scared at this part, just try it, and retry it and then check it by flipping it over and putting back over the front of the chair.
I flipped it right side over to see how it would look. I was seeing if my darts had taken up enough of the fabric to fit snuggly but not too tightly. Remember we will be stapling the front area and if the darts aren't taking up enough fabric you will have extra fabric to staple, which you want to try to avoid because it can look bunched up. Ok, my fabric fits pretty good, after I did this check, so now I take it off and bring it to my sewing machine and stitch a line right where I put all my pins on the dart.
This is the stitched up dart.
Now cut off the triangle of fabric that was created when you stitched the line. Leave yourself about 3/8" or 1/2" of fabric so you can iron it out flat.
Cut the fabric and then make a small cut to the point in between the seam so you can iron it flat.
I stitched both darts, trimmed them and ironed them and then put the piece back on the chair to see if it fit nicely. Nice enough! You can see there is excess fabric on all sides of this piece. That is good. All we were trying to do was to get this piece fitted over the front area of the chair.
See how it drapes over the "knees" of the chair? Very good. And see how ragged the top edge of the fabric is now that the darts were added? I will trim this off in a straight line, and this doesn't have to be perfect. Just trim it up kind of straight.
I left it in place, and trimmed it out straight. The sides are still just loose with lots of extra fabric hanging off the sides. Ignore these for now. See the white fabric on the existing decking area that shows the manufacturers label? Well we are now going to cut a piece of fabric for that area. You can use a piece of lining or other fabric if you want to save your good fabric, but I am just going to use the same toile fabric as I had plenty of it.
I cut a large enough rectangle and pinned it to the decking front piece with darts. Put your fabric right sides together and then pin in place. This piece of fabric you are sewing onto the front edge fabric has to cover the white area you see, plus have enough to tuck into the crevices.
I flipped back the second piece of fabric that is now pinned in place to the front fabric. I will only sew the one pinned edge (which is the edge we trimmed straight with our scissors).
I stitched it at the machine then ironed the seam flat, then brought it back to the chair and laid it in place. The fabric has plenty to get tucked into crevices on the left and right.
In the back I will trim it straight across to attach the third piece of our 3 piece decking pattern. Two down, one to go!! We are almost finished with this part!
The last piece of the three piece pattern will need to be cut to come out through the chair back and get stapled onto the bottom back side of the chair frame.
This chair has a space on the bottom area. Assess your chair and then look at where the existing upholstery is stapled, or just folded or stitched. It is kind of like a blue print for what you have to do to your own chair. Not all chairs are going to be the same, and remember, this is the FIRST time I have done this. But fearlessly I plunge ahead, as I can sniff the finish line!!
I measure roughly and cut a rectangle of fabric for my third and last piece of the decking area. Above you can see the seam line where it was stitched and then ironed open in a flat position. You want to iron all seams because it will lay flatter and look more professional. You can also see the left and the right raw edges of the second piece of our pattern, just laying on the chair. It is all still getting fitted, nothing has been stapled yet. We are making the pattern and fitting it before we staple in place.
After the third piece is attached, I laid it all out and fit it at the "knees" (the front corners where the legs are, by placing the darts over each knee. Then I took a flat wood spoon (or spatula) and I shoved the fabric through the very small opening so it would fall out over the backside of the bottom of the chair. That is the area where the third piece of fabric will be covering the upholstery.
Now the back end of the decking fabric is seen over the bottom area of the chair.
I fold under the raw edge, about an inch or two to prepare it to be stapled onto the bottom of the back frame. Now move to the front of the decking and start stapling there, saving the rear back part for last.
The left and right sides of the crevices (the interior upholstery cracks where sides meet the seat) parts of the fabric are still sitting on top of the decking. That is ok. Lets just start stapling the front along the frame and get the corners stapled around the knees. Then we will deal with crevices after that.
Staple from the center out a few staples in each direction. Then move to the right corner and smooth it out and add a staple and do the left side as well. There will be a little excess fabric at the corners and you will make a nice little fold, one on each side of the knee and staple in place. Watch how to do this part.
As you come around the front corner, turn the fabric back on itself to create a finished edge, as there are no staples adding along the area where the base of the arm frame meets the front corner. All you have to do is EXAMINE your chair for staples, and add them where you see the old upholsterer added them. COPY what you see! I always imagine what the next couple of steps will be, before I add staples, so that way I don't have to pull any out to start over.
The fabric above is just folded and laying close as it can to the arm frame. Now I will add my staples to the bottom of the frame, and this folded fabric edge will be held in place by tension.
The left corner is all stapled in tightly, and you can see there is a little tuck of fabric on each side of the corner/knee area, which is where I took up the excess fabric. (Note that there are no staples on the left folded piece of fabric, and the fabric is held in place nicely without them.)
See the little pleats around the knee that is created by folding extra fabric and stapling it in place? You will see this a lot in upholstered pieces. After stapling the bottom, I trimmed off the excess.
Now I am going to fold under the edges of the crevice fabric pieces and then take my flat wooden spoon and shove it deep into the crevices! Look how good the chair looks already!
At the very back that third piece of the decking pattern has been pushed out and is dangling off the back. You can see the gap between the frame. But the next step is to fold under the edge of each crevice fabric and shove in deeply then anchor with a few staples.
Look how smoothly the front of the chair is looking! Don't worry about the raggy threads we can clean it up later when we apply the gimp.
Colby was really starting to put his foot down...he wanted me to pay attention to him, right when I was trying to finish the decking inside edges.
So I didn't take a pic of it cuz I had to shove the fabric in with the flat spoon and staple it before he could stop me. Just insert the fabric in the crevice as tightly and smoothly as you can, and try to have the raw edge turned under when you shove the nail gun deep into the recess of the crevice.
At this point I had to take a break, because someone wasn't happy.
He really wasn't happy. Enough was enough. Haha.
Anyway, the chair is just about finished. I did the back side and stapled that
third and last piece of the decking pattern onto the back frame and trimmed it.
For the cushion, I cut out a slipcover style pattern, as most cushions are not upholstered,
as much as they have slipcovers with zippers. I stitched that up at the end of the day
and then I made a ruffled slipcover for the matching ottoman.
The reason I made the slipcover was two fold. Number one, the ottoman had a cushion attached to the base and I couldn't figure out how to staple it on without taking the entire thing apart, and removing the existing pink fabric. With a slipcover I could just fit it over the shaped ottoman and if I added a ruffle it would still expose the curvy legs. The second part is that I can launder it if needed, and that is where Colby usually sits when I am on this chair. I made small pleats along the edge of the ottoman slipcover to give it feminine dressmaker details.
I will add to this tutorial when I add the gimp, but that won't be for a week or two...
I have to say that reupholstering was way more easy doing it this way, and I think
if you aren't a total perfectionist, you would be thrilled with the results. By the way, this took me one full day, but I did it in two, because of my puppy Colby.
I love how it came out, and if you have a chair in good shape, then maybe this method will work for you too.
Oh, and for those interested, the name and brand of the fabric is Covington, Bosphorous, in Flax.


It really came out beautiful. I even love the deconstructed look without the trim. You make the tutorial look so easy. I might have to give it a try.
ReplyDeleteI kind of like it deconstructed too...you don't really notice it. But I will add gimp and I think some bronze tacks as well.
DeleteThank you for this tutorial, it was easy to follow (especially with all the pictures ). If the chair had come with piping what would you have done differently? Tia.
ReplyDeleteLaura
I would have just pulled off the piping and then did the same thing. Most of that trim is glued on, so pry it off or pull it off!
DeleteAmy You did an amazing job. What an informative hostesses it gave me hope. For the first time there are so many beautiful antique chairs here in Savannah that are so inexpensive but are very worn looking . I have many things they still have to do but I think this is on my spring list because I have a beautiful game table that I would love to have 4 matching chairs. Thank you so much for this post it was brilliant
ReplyDeleteThanks Savannah Attic!
DeleteWow....it turned out so beautifully, Amy! You did a fabulous job. With Colby as your little helper, how could you go wrong? lol
ReplyDeletexoxo laurie
thank you Laurie, and with Colbys help it just took me a little longer. lol
DeleteYour chair turned out beautiful, love the fabric.....looks beautiful in your home.....
ReplyDeletethanks for your sweet comments Mari!
DeleteBeautiful job Amy! Key is a great staple gun. I did this using a manual one, can you imagine? I bet Colby loves it too. Sweet photos!
ReplyDeleteI have done simple seats with a regular and electric stapler and it can be brutal. For a big project you really want a pneumatic staple gun. Thanks for commenting!
DeleteWhat a great tutorial, the pictures are awesome. How did you do the back of the chair back? I have a similar style chair and can't figure out how to do the back? Can't wait to see the finished project.
ReplyDeleteRobin I will be showing how I did the back and the trim in the next installment. It is done with glue not staples.
DeleteWonderful transformation and great fabric choice. Thinking I should add a pneumatic stapler to my wish list, so much more fun and ease than my staple gun.
ReplyDeleteyou won't believe the difference Katherine.
DeleteWow. It's beautiful. Thank you for sharing the how-to. It's inspiring!!I totally get Colby. Lol. Roan would do the same. Hugs.
ReplyDeleteThis is really fantastic- thanks for the blow by blow instructions! I have this exact chair that presently is covered with a blanket. I have looked at it a thousand times and just didn't have the guts to tackle it. But now I am all in! Was 7 yards enough for the chair or was it too much? I don't have a matching ottoman.
ReplyDelete7 Yards was plenty, but I didn't really have to do any matching. And I did have the ottoman too. I still have about a yard leftover. I think 5 yards would do just the chair.
DeleteLove this Amy....I have lots of this fabric! One of my favorites...love Covington. Your new chair looks so fab in your room now!
ReplyDeleteJanet
The Empty Nest
thank you Janet, we love our toiles!
DeleteThis comment has been removed by a blog administrator.
ReplyDeleteYes you can remove it and use as a pattern, but a ton of work. I wonder if you could have just used a lining and the new fabric instead...
DeleteVery nice job Amy. I love your chosen fabric. So pretty with your décor.
ReplyDeleteAmy, the chair turned out beautifully! I have upholstered chairs this way, as well as removing the old fabric and the 3 million staples that go with it! Upholstering over the old fabric is so much easier! And you are right, a pneumatic nail gun is essential! Love your fabric!
ReplyDeleteCindy
Edith & Evelyn Vintage
I loved your settee and how you recovered yours using a very quick and easy method as well! When I saw you also went over the existing fabric, I knew it wasn't such a weird idea! Hahah
DeleteEXCELLENT tutorial... I just now Pinned it for when I tackle our settee. Thank you so very much!
ReplyDelete~ Lin
thank you Lin!
DeleteSo amazing! Both pieces look great! This is a fantastic tutorial. I'm inspired now to do my dining chair seats.
ReplyDeleteAwesome!
DeleteUgh, stinky mildew in fabric would not be good to recover. Thanks Janet!
ReplyDeleteThis makes reupholstering seem much less intimidating, and that fabric is gorgeous! I can totally relate to projects taking longer than they need to because of puppy breaks. It's just too hard to say no to those sweet faces!
ReplyDeleteThanks Anne!
DeleteGreat instructions! I just have a question I'm seeing the raw edges very close to the staples will the fabric not pull out? I have two chairs very similar and fabric awaiting my courage to take charge. Your tutorial was so helpful I may start tomorrow.
ReplyDeleteThe pneumatic staples keep the fabric in place with such strength. As you can see in many of the photos, the old staples were done exactly the same way. Good luck!
DeleteWow!!!...I am bookmarking this post for future reference!....You did an amazing job Amy!!!!...So beautiful...and love your assistant!
ReplyDeleteThanks Shirley!
DeleteLove it Amy! Love the fabric too and it turned out beautifully.. thanks for the tutorial!
ReplyDeleteThank you Mariondee!
DeleteThis chair looks amazing. You're good!!!!
ReplyDeleteThanks Cathy!
DeleteWhat a clear and easy to follow instruction you give...
ReplyDeleteI have an armchair just like it and was also thinking to leave the existing fabric because their really is nothing wrong with it.
This helps very much, love your fabric choice, by the way!
Ans the pup is gorgeous!
Thanks, Mariette
Good luck and thank you Poemm!
DeleteGreat tutorial, Amy! The chair looks perfect in your gorgeous home! LOVE the fabric you chose!
ReplyDeletexo
Thanks my friend!
DeleteAmy,
ReplyDeleteThe chair looks amazing! It is just so inspiring that you were able to do it all yourself - makes me (almost!) want to try some DIY! And I love the fabric choice. I have seen that fabric before and it is really beautiful. The chair makes the room now!
Sheila
www.maisondecinq.blogspot.com
Thanks Sheila! I love that fabric, and have always admired it as well, and this project seemed perfect for it.
DeleteAbsolutely the most beautiful chair! Just...beautiful!!
ReplyDeleteWhat a great tutorial, Amy! I'm so glad I found this. My parents have a sofa that has a wooden frame, like your chair has, and I just put it up for sale on craigslist for them. But now I'm hoping nobody buys it so I can try this. It's terribly ugly now, but I think it can be so beautiful with the right fabric. I've never sewn a pillow cover before. Actually, I don't really sew. But my mom has a sewing machine. So I'd love to know if you have any tips for a newbie for sewing pillow covers.
ReplyDeleteThanks! Jenise @ DIYFunIdeas.com
I bet there are tons of youtube tutorials on sewing pillow covers, but maybe I should make one!
DeleteGreat tutorial! I've done several of the open arm bergere chairs but none like this (so far). Beautiful fabric choice! I'm dying to know the name/maker and where you purchased it. Thank you!
ReplyDeleteI mentioned the name at the end of the post, I think I will edit it and add it at the top! It is Bosphorus Toile by Covington.
DeleteAmy, I have searched through your blog posts to find the tutorial where you added the back fabric and the gimp to your chair and have been unable to find it. Did I miss it somehow? You hinted that you glued in the back fabric insert, and I'm dying to learn how you did it! I am in the process of reupholstering my first of 6 dining chairs, and if I can do it more quickly, instead of ripping all the fabric and ga-zillions of staples out... that would be heaven! Thank you for the very detailed tutorial you've given us so far. The chair, as well as your home and garden, is beautiful!
ReplyDeleteThanks again!
I finished the second part kind of later than planned, and have a link to it at the bottom of the post now Tru!
DeleteGreat Job! I have two chairs with tufting, wings and no wood trim work. Do you have any suggestions for re doing those using this method? I was thinking about painting them or even just putting the sheet over them since they are in an unfinished basement sitting area. I reupholstered a chair once and re worked the tufts from victorian to modern but is was some work.
ReplyDeleteGreat job! Very informative post! I love your step-by-step instructions!
ReplyDeleteHello. I am attempting to upholster two very similar chairs to yours. I am running into an issue, however. The crevice that the staples go into is very deep and narrow. Was your chair the same? My staple gun will not fit into the crevice and so the staples don't go in all the way. Did you have any issue with this? What brand/model was your staple gun?
ReplyDeleteAmy,
ReplyDeleteGreat job! I recently recovered two 1970s-80s love seats I had purchased at an estate sale for $80.00. I also went right over the old fabric as well. But the seat cushionso were so deteriorated they needed to be replaced. So I decided to make single cushions for each love seat. It was also my first real attempt at a reupholstery job this large. But I'm very pleased with my work. I also had my helper Betty, a American bulldog mix, depositing toys and and proforming quality control every step of the way. Any way I just wanted to share my similar experience. Lydz
Hello Amy, great job on the chair and ottoman. I recently reupholsters two love seats that I purchased at an estate sale for $80.00. I also went over the old fabric. But the cushions were to deteriorated that I decided to make single cushions for each love saet. I cut new foam and made new covers. I'm very pleased with my work and that it has held up for two years now. I also had my helper Betty, my American bulldog mix. Quality control inspections and toy deposits every step of the way. I just wanted to share my similar experience and enjoyed seeing Colby in your photos. Lydz
ReplyDeleteBest tute of its kind I've seen. Thanks for doing the labor of working on the chair AND taking photos. Now I know what to do with my tattered $50 prov chair. It'll look like a million bucks, with your help. Thanks again.
ReplyDeleteGreat idea to go OVER the original fabric! GREAT TUTORIAL!
ReplyDeleteI have - and am reupholstering the exact same chair right now! How COINCIDENTAL that I found your blog on Pinterest!
I am doing mine in a moleskin velvet & because of the fabric thickness, I decided to completely strip the old fabric. So a bit more work, but the groove in which the original staples were in was already so full of fabric and glue it didn't seem any more would fit! Might be something to think about for anyone considering this.
And, a bonus.... the old pieces serve as a pattern for cutting the new fabric.
Yours is looking great, and it seems the dog agrees!
THANK YOU so much for this detailed tutorial and pics! This has given me the confidence to do it myself! Love the dog!!! TY again! much appreciated & I'm so inspired!
ReplyDeleteFabulous tutorial! I learned how to upholster from my mom years ago and learned quickly that it takes time, patience, planning 2 steps ahead (as you said), making sure you don't cut pieces of fabric too small and breathing through the process! lol Your tutorial is the best I've ever seen!! Thank you from the many tired pieces of furniture that are given new life through this talent called upholstery! Blessings, Edie Marie
ReplyDelete