

A pale blue silk roman shade hangs in my bedroom alcove.
I have a little secret to share:
this roman shade used to be in a darker blue cotton paisley fabric by Waverly.
I had it custom made for this room 4 years ago.
Roman shades are labor intensive and so the cost is high in a workroom.
Did you know it costs more for a roman shade
than for a pair of floor length draperies?
I wanted to keep the roman but I didn't want to pay
my workroom to fabricate a new one,
or even make a new one myself (!), since this one was functioning perfectly fine.
Here is a no-sew trick you can use to update your romans.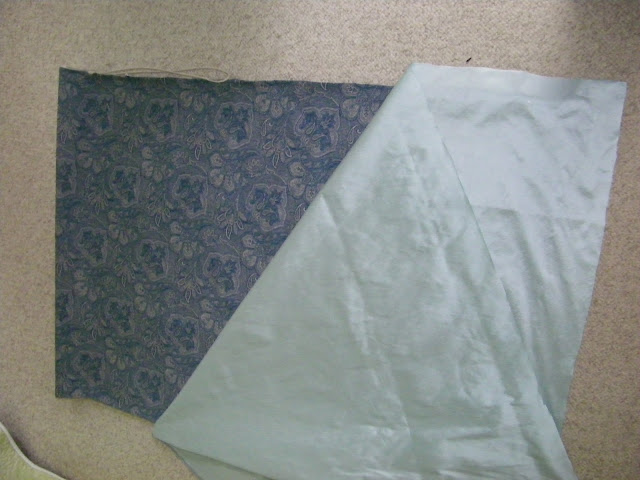 Remove the roman shade from the mounting bracket and lay it flat.
 Remove the roman shade from the mounting bracket and lay it flat.
Lay out the new fabric to cover it and give yourself several inches on all sides.
Here is the aqua silk I wanted for my new bedroom makeover.


bonding tape to hold your hems in place.

Insert the bonding tape and iron... Hot glue the side hem of the new fabric to the existing roman shade edge.
 Hot glue the side hem of the new fabric to the existing roman shade edge.
You can see the little roman shade rings and cord.
I rest my glue gun on a piece of cardboard.

make sure the cover fabric is fitting properly
as you attach the side hems with the glue gun.
You will attach the top of the fabric to the
Roman mounting board with staples, right over the old fabric.

Just looks like a flat piece of fabric here, but there is a roman shade underneath.

A light line of hot glue affixes the face fabric to the shade.

The new fabric should be slightly larger than the old fabric when it is finished.

It is all glued around the edges. A pretty piece of trim is added at the bottom of the shade for a little bling.
 A pretty piece of trim is added at the bottom of the shade for a little bling.
This is optional. You can add fringe or leave it plain. Now the shade is ready to be popped back into the mounting brackets.
 Now the shade is ready to be popped back into the mounting brackets.
This is a quick fix to perk up an outdated look and it operates perfectly!
These treatments are not washable anyway, so using glue isn't an issue.

I like them messy and crunchy looking,
however if you want them to pull up in straight tailored folds it does that too.
When I close my roman at night I see the pretty trim at the bottom.

Voila!


Wow! Thanks so much for that tutorial!!! I have yet to learn to sew and would have never guessed yours wasn't sewn!
ReplyDeleteGood Idea!! And super pumped you were featured on BNOTFP!
ReplyDeleteThat looks great! I love the new fabric! I am having a dilemma about buying slipcovers. If you have a chance stop over to my blog and let me know if you have any opinions on steering me in the right direction. ~Hugs, Patti
ReplyDeleteGreat job on these! I'm stashing this idea away for future use!!
ReplyDeleteYou are really clever. I love all the detail and I am a 'crunchy' person, too!
ReplyDeleteXO,
Jane
You just made my day. I have a London Shade that I just replaced. I am going to try the same thing with the London Shade. It should be the same concept. I'll let you know. Thanks for inspiring me!
ReplyDeleteI love silk...your transformation turned out perfect. Romans are what I need for my great room windows. They are not covered at all right now but it's due to my view...but with the cold winter air I've decided I've got to do something to be more heat efficient {at least during the night time hours}.
ReplyDeleteI know I've seen a few simple tuts for making them....Including the french doors I have 36 feet of glass in this room....a small fortune for romans if made in a professional workroom.
Hope you are doing well. I'm getting over some vile bug that I caught over a week ago....and I'm expecting more snow tomorrow night! OH, JOY! We have had an unusually heavy amount of snow this winter. It just won't quit! LOL
Hugs,
Stephanie ♥
Hi Amy,
ReplyDeleteThis is just downright smart! Now I wish I had so roman shades to redo! I just love the blue silk fabric, it's lovely.
hugs
Sissie
Now that's the way to recycle! Love that shade.
ReplyDeleteOmigosh Amy, thanks for sharing your secret. I've always wanted a roman shade in my rooms, but dont' know how to sew and too expensive to custom order. Yours is a thing of beauty...love that color and really loving that new corner.
ReplyDelete-marie
Great idea! They are very pricey!
ReplyDeleteawesome idea! I didn't realize you were from Mass too. It is always fun to meet another Massachusetts girl!
ReplyDeleteI love it!! Even though you had the know how and resources (I'm assuming the work room is a group of sewers that work with you), you still "cheated". I love your roman shades and everything you did in your bedroom and bathroom.
ReplyDeleteP.S. I'm still working on pictures and ideas for my sketch prize. :)
Hi Amy; that's a great idea for those that already paid for custom romans and just want new fabric! I might add that if the old fabric is a print that shows through the new, just add a layer of interlining (or white flannel) in between the layers, or even blackout lining. If you'd like that beautiful trim to show a little more, you might try moving the bottom row of rings up an inch or two and attach a dowel rod (covered in a sleeve) to that bottom row of rings. Oh, and if you have a tiny bit of that trim left... you could just cut out the flowers, glue the loose edges to the back, and affix them like buttons either across the board face (maybe 5 of them spaced evenly) or even just two... one near each corner of the board face!
ReplyDeleteEither way - I LOVE raw silk all scrunched up! I think silk is meant to be crunched up don't you? I also love the imperfections of the nubbies on silk - and love it a bit puffy when it's backed with a heavy interlining or even an English bump! Bottom line with silk - flat and perfect is boring, blah and then it might as well be poly, right?
Love the shade - love the room - Enjoy it!
Michelle
New England Style
Stitch Witchery has gotten me out of many a bind! Love that you showed this.. and you are right, Roman shades are very expensive.
ReplyDeleteWhy did I not think of that? I left a pair of roman shades in a rental b/c the color was all wrong. I purchased them for $5 at a yard sale and figured I got my money's worth. Well, this is definitely a tutorial for me! Thanks for the tip.
ReplyDeleteYou're so clever! That trim is really pretty and unique. Love that. The window looks wonderful!
ReplyDeleteNancy
Thank you!!!!
ReplyDeleteI have beige roman shades in all of my 18 windows because I love the look from the outside. My mother ingrained into my brain early that a house looks better from the outside if the backside of all window treatments match...
SO...I've been trying to figure out the best way to add different fabrics to the fronts of my roman shades and I LOVE YOUR POST!!!
THANK YOU THANK YOU THANK YOU!!!