

Last week was a bit of a potpourri for me with a little bit of everything thrown in the mix. I came across a contest looking for cartoon sketches depicting a woman and her dog for an online company called Venturemom. So I thought I would give it a try and send in the head shot, the dog shot and then a full body scene that they asked for. The scenery is my own idea of what this woman might be doing~I will find out if I have a shot at becoming their cartoon artist in January. Wouldn't that be fun?

My dining room table is turned back the long way for the upcoming holiday~I couldn't resist taking a picture of where I did the sketch. Usually I sketch in my office, but I had the house to myself and I lugged my things to the dining room table~you can see Dillon peeking at me as I am taking the photo.

This week I went to a clients house to hang up Pottery Barn draperies from custom hardware from my company. It is a sign of my times that many of my clients buy ready made draperies now. I am (now after 20 years) an expert installer and am taking you along for the ride to show you that you can get a decent look from ready mades if you pay attention to details.

The client ironed out the panels ahead of time for me. Always IRON your panels or it will look crappy. She left for work and I came in to do the job so she would return to a room with draperies. Nice, right?

Good looking hardware makes a big difference too~so buy the best you can, or hunt around for good looking affordable hardware. This hardware is by House Parts and is the antique bronze line. The rods are 2" wooden rods.
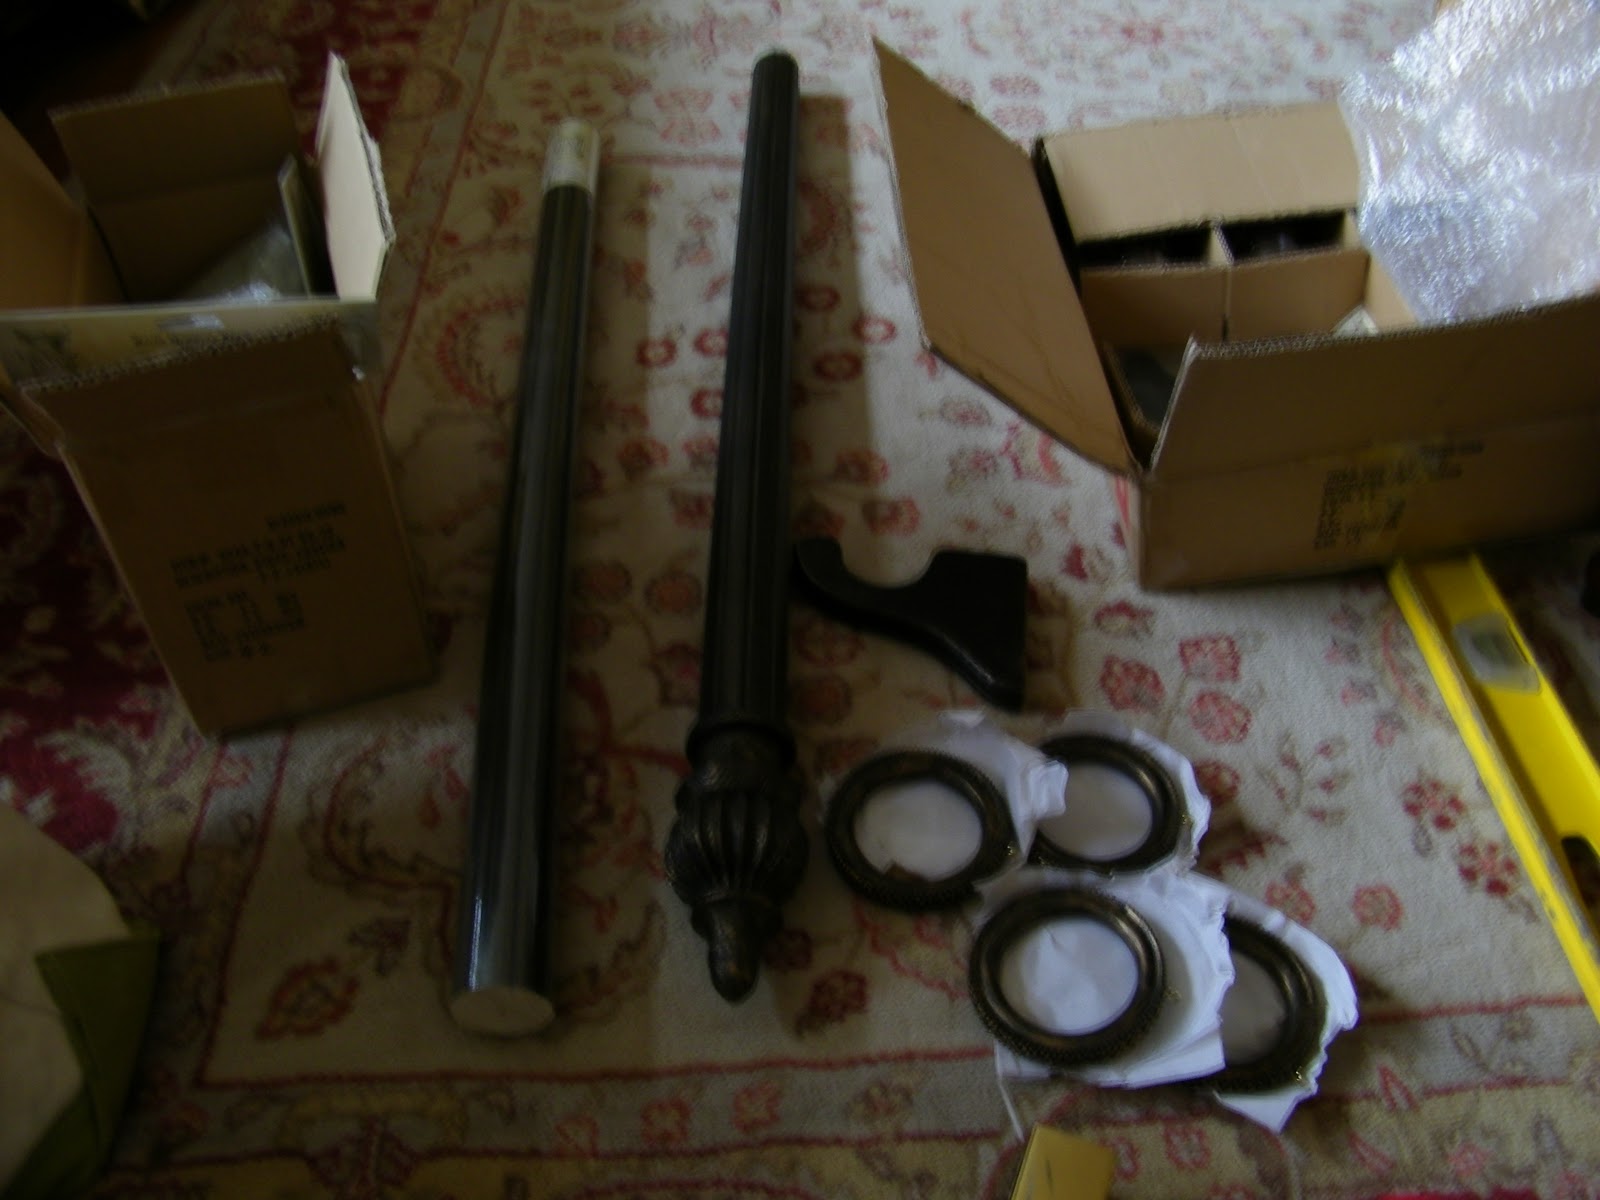
Here we have a huge window with a low ceiling. Her previous treatment had a top treatment that made the room feel very squatty so that had to come down. Instead of running one rod the entire length of this 11 foot window, I used a 6' pole and cut it in half and mounted each on one end.
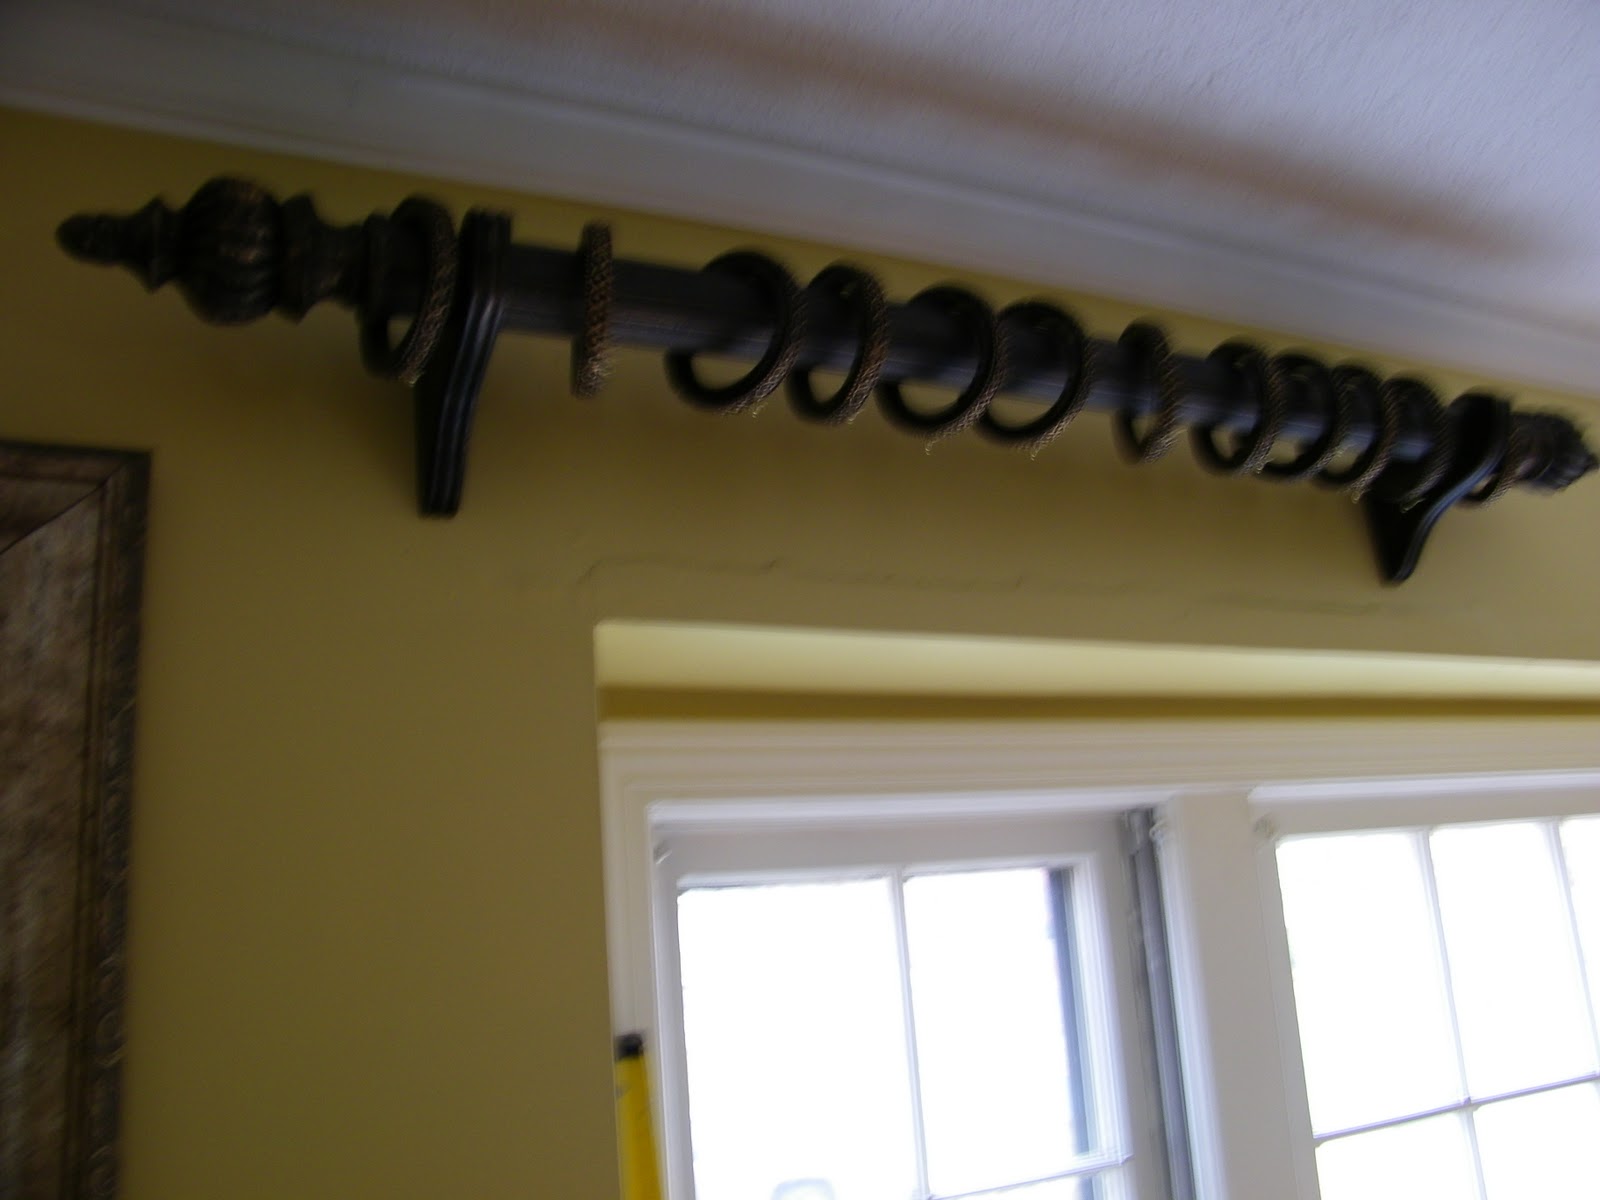
No tripod=blurry pics. Sorry about that. Here is the finished hardware. Try to mount your hardware as high as you can, especially in a room with low ceilings. I would have mounted it right at the ceiling, but since we were not doing custom, I had to accommodate the length of the panels, which she wanted to sit on the floor.

Since this is also a very wide window, 1 panel would have looked skimpy on either end, like little sticks. So I hung up two panels per side and then used a stapler to hold the panels together so they wouldn't gap. You could stitch it if you wanted to, but time is money and staples will not hurt these panels and they work great.

The finished panels flank the sofa. This PB fabric was nice and soft and the colors worked with her room.
We plan to hang some decorative items in the middle, maybe an iron piece, or a series of plates or something.

This room is a bit french country meets old world~and the ready mades worked out fine, just in time for Thanksgiving.

All last week I have been shopping and planning my installation of accessories at another clients home. Here my shopping cart at Home Goods is loaded to the gills. I did 3 shopping jaunts at 3 different Home Goods to find what I wanted. We are working on a budget and Home Goods is the greatest in that regard. I will be installing at the beginning of the week and I will have before and after pics to share.
This is my favorite kind of decorating to do~I get an image in my head of how I want the rooms to look, and then I go searching. You have to be focused and not get sidetracked on the volume of things in the store.

Oh yeah, and I finished the two long window seat cushions too. I didn't get pictures and they are all wrapped up in plastic ready to go my clients home just in time for the holidays. They were done in a blue quilted fabric that drove me bananas. Note to self: never make cushions out of quilted fabric again. Ever. The holidays pick up for us decorators as everyone tries to get the finishing touches on their homes. Hope you have a great week ahead and I will be sharing my accessory installation with you soon.


I didn't know that you could draw like that. That's a wonderful talent to have! Hope you get selected! Those drapes look great. I'm impressed that you can hang those by yourself. I would have to have someone help me with something like that. I guess your experience pays off. Can't wait to see the room after it's completely done.
ReplyDeleteAmy, what cute cartoons. Love the drapes.
ReplyDeleteThanks for the drape-hanging tips - they really look great! You left out the parts about climbing up the ladder, forgetting the drill, climbing down, getting the drill, climbing back up, he big piece of plaster falling out when you drill the hole, climbing down to get a piece of tape to drill through, filling the first hole, touching up with wall paint (if available), drilling another hole, hitting something metal and having to move the hole 1/4" to the left, remeasuring, filling second hole, matching paint, etc., drilling the third hole, dropping the screw/piece of hardware you are trying to attach, climbing down, climbing up. Repeating the above on the other side, threading the curtains on the rod, having the rod fall apart onto the floor, climbing down/up/etc. Putting up the rod, finding it to be backwards, removing rod, removing curtain, down/up. Finally putting up final rod to find whole thing is a "tad" crooked - probably about 1/4" and realizing that for the next twenty years it will drive you crazy if you don't redrill/rehang/down/up right now.
ReplyDeleteI bought PB drapes for my master and they are very soft, too, Amy. In fact, I was surprised at that and they hang so well. I used to go to Home Goods a lot when I was buying for client's on Long Island, too. {I noticed they don't have Home Goods here in Ohio, but I have seen TJ Maxx and Marshalls}. I'd do the "push a cart/pull a cart" thing and always had people visually picking over what was in my cart. It was fun and, surprisingly, I stayed focused on what I was there for.
ReplyDeleteThe room is beautiful and the drapes contribute to the overall cohesive look. I like the colors used in the room. Thanks for sharing how you complete a project.
ReplyDeleteAlso, good luck in the contest!--------Shannon
Oh my goodness, you are so busy! Hmmmm, sounds kinda fun shopping at Home Goods to help someone decorate. and... What a luxury for your client to come home to her beautiful curtains all hung and perfect. They do look really good in the room. I like the partial rods too. I'll have to put that technique in my brain where i try to remember cool decor ideas. Good luck on the cartoon contest... your lady is cute, like a little cartoon Amy out shopping!
ReplyDeleteCindy
It's always amazing to me how much curtains finish the look of a window. Great tip on stapling the panels together, will have to do that myself. If only I could figure out what I want for my windows! Is your client going to add anything for privacy? I love your sketches- you have an ooh-la-la style. :)
ReplyDeleteYou are quite the artist! I hope you win. The window treatments look fabulous. I see what you mean about the hardware. It really does make a difference.
ReplyDeleteWOW, I am now officially exhausted. You are a dynamo. Happy Thanksgiving
ReplyDeleteHi, Amy! Been catching up here. These panels look great. I love using shorter rods with a decorative element in the middle. Practical and a bit unexpected! I have one of the items you picked up from Home Goods. The wire basket with the liner. I love it!
ReplyDelete